


")
")
")
")

Build an IoT UV Device and App
This post is part of our Blynk your Zio blog Series
Introduction
Zio has developed a tiny board that can detect UV (Ultraviolet) around us. Now you might be wondering WTH would I want a UV Sensor for, right? Unless you’re Spectrum who have UV superpowers (I think not), the perks of knowing the existence of UltraViolet could prove beneficial.
For those who are not aware, the function of the UV sensor is used for determining exposure to ultraviolet radiation in the laboratory or environmental settings. Things like the prevention of sunburns and skin blemishes by using UV sensors in wearable technology and smartphones have seen a growing interest in healthcare industries. In addition, there is a rise in UV sensors being used in many different applications, like automobiles, and robotics.
So now you know what is useful about UV Sensor, let us create a simple project to test it out with our Zio UV sensor~
Objective:
For this simple project, you will learn how to build a device that can detect UV and an app with it too! Awesome right?
Difficulty Level:
Helpful resources:
We have created Qwiic Start guides of our Zio products which help Younglings and those who wanted to use our products to get a qwiic start ahead with their projects. It is necessary to complete this guide before you start attempting to do this project. :)
Blynk your Zio Qwiic Start Guide
The Steps
To qwiicly prototype this project you should already equip yourself with the following:
Hardware:

Software:
Steps
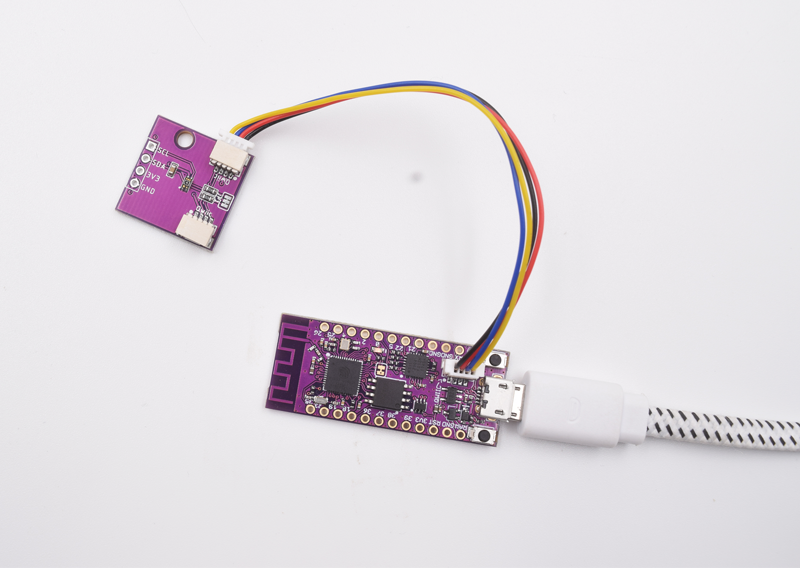
Step 1 Connect your UV sensor to Psyfi32
Step 2 Program your Zuino with UV Sensor
To do that you need to include the following libraries for the display to work with your Zuino board. Open the Blank Blynk Zio code. Add the following UV Sensor library.
#include "Adafruit_VEML6075.h"
Then you need to define your UV Sensor
Adafruit_VEML6075 uv = Adafruit_VEML6075();
In the setup code type the following:
Serial.begin(115200);

 Serial.println("VEML6075 Full Test");

 if (! uv.begin()) {

   Serial.println("Failed to communicate with VEML6075 sensor, check wiring?");

 }

 Serial.println("Found VEML6075 sensor");
The above code is simply for the Serial monitor. It will give an indication of whether your UV Sensor is online or not. If your board could not communicate with your sensor, then the serial monitor will display an error.
Step 3 Set up your Blynk App
Open your Blynk App and create a new Project. Name your project and choose your device as ESP32 Dev Board. Set Connection type as Wi-Fi.

2. Add a Value Display from the app’s widget box.
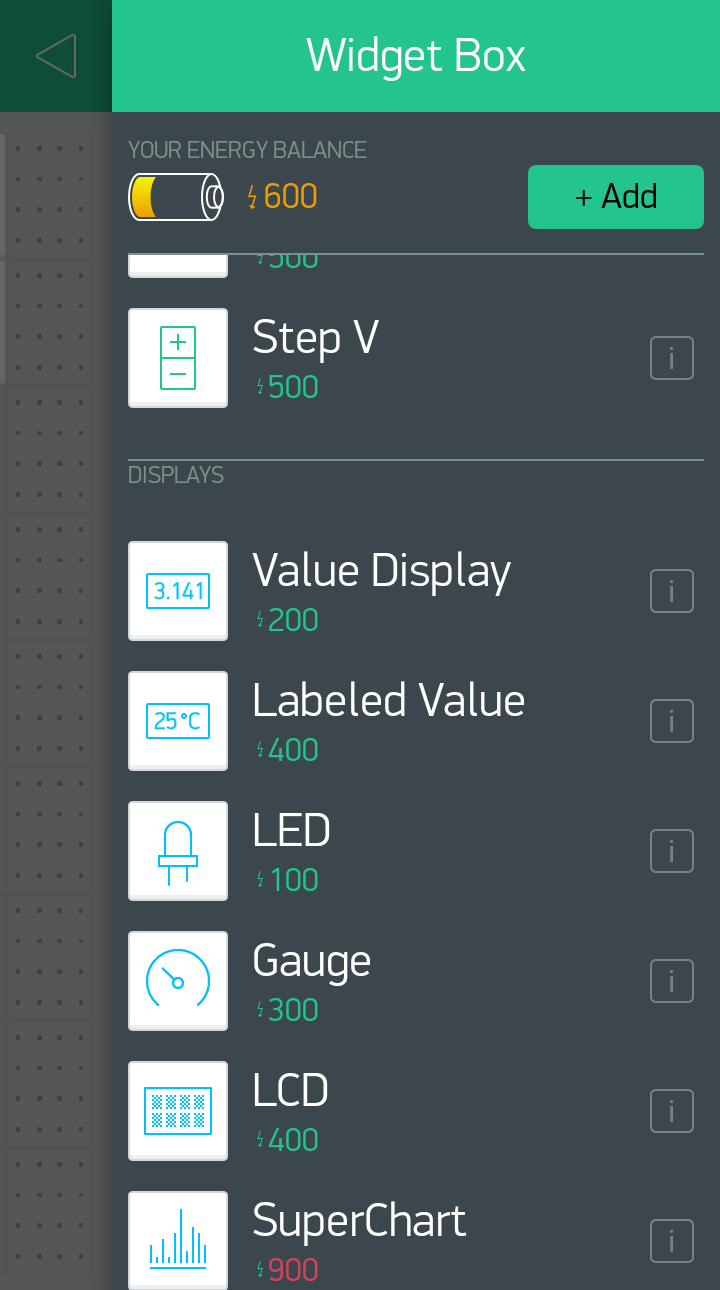
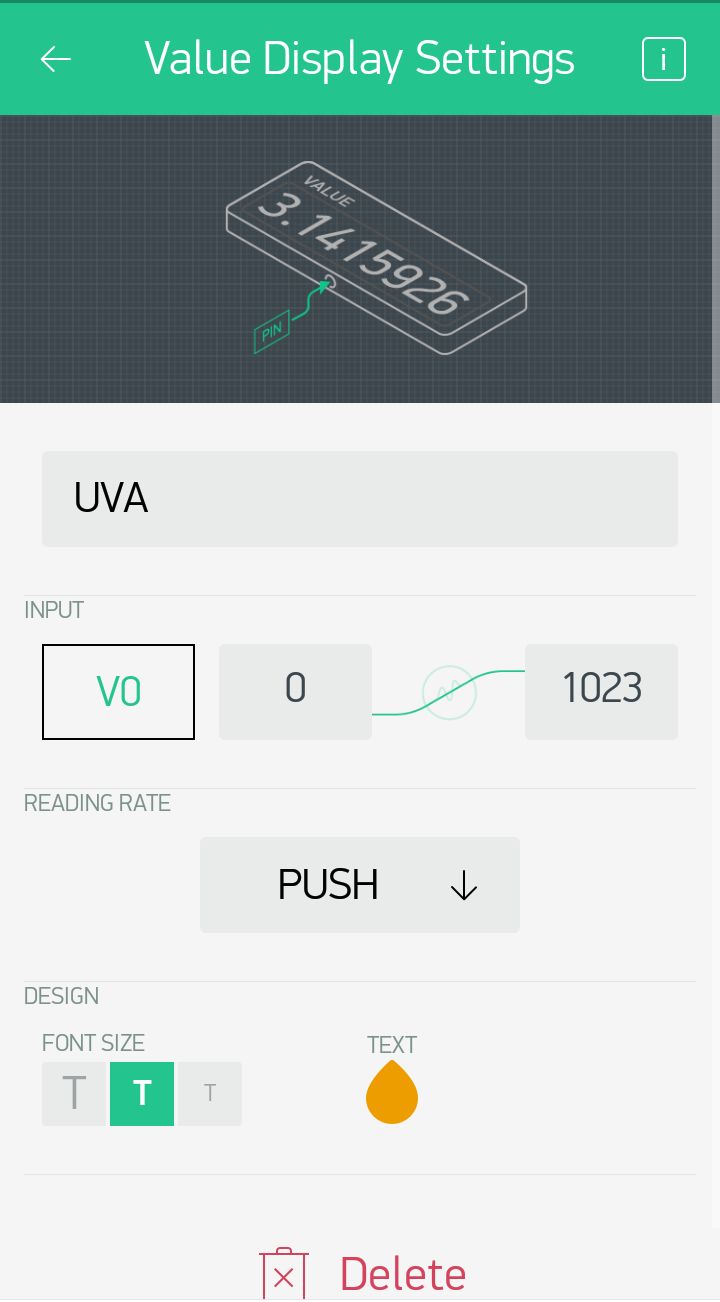
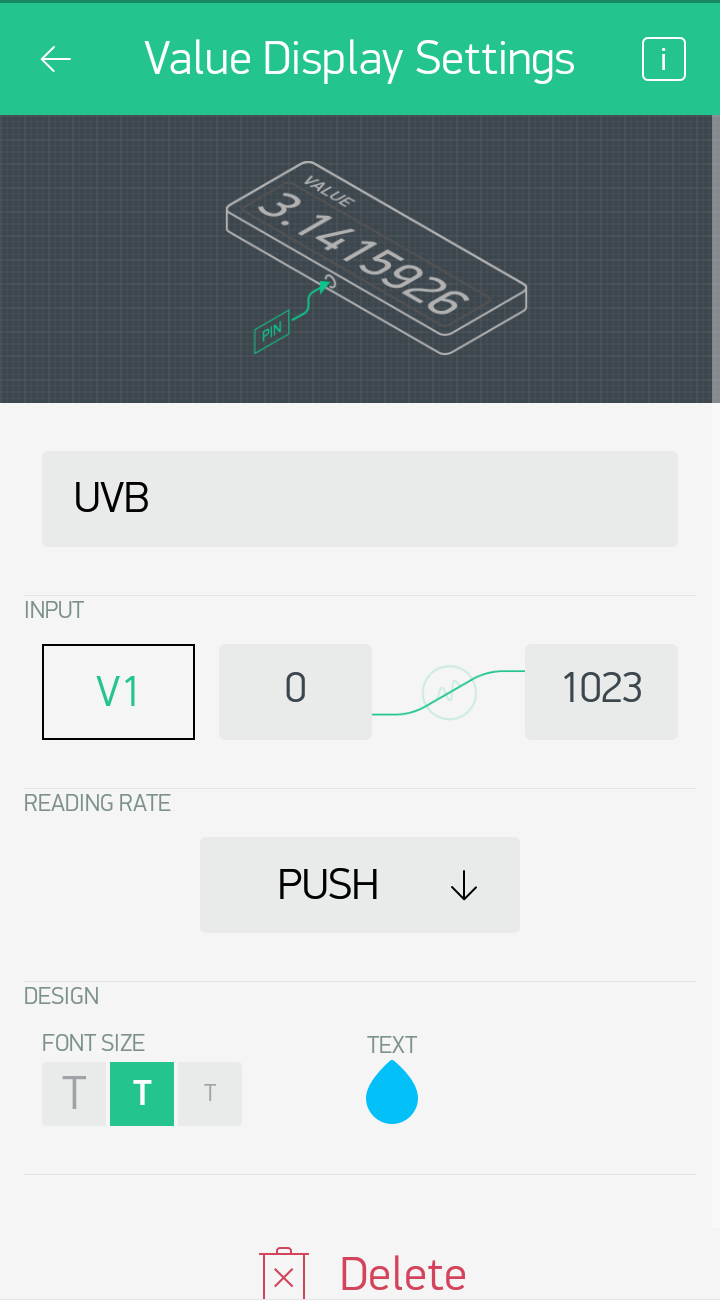
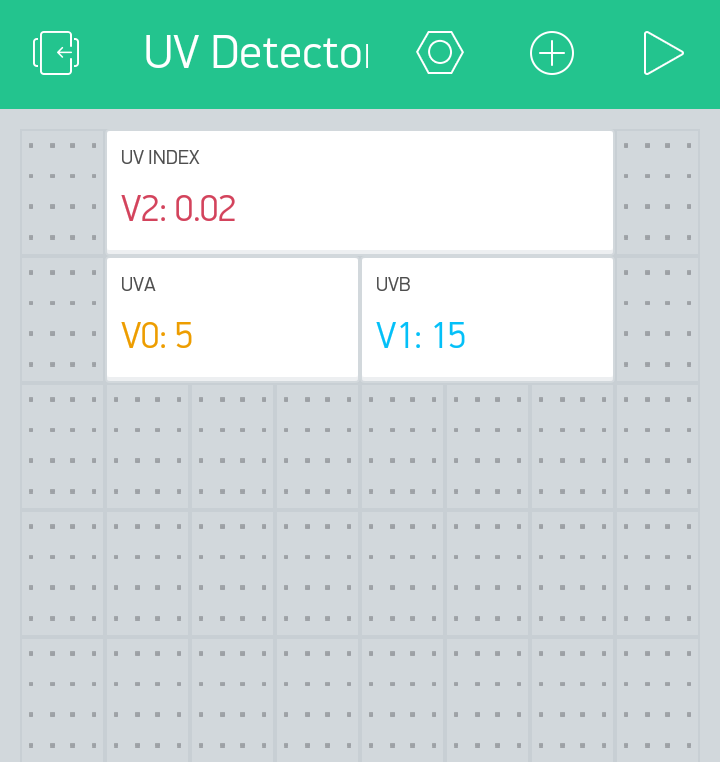
3. Name your Value display UV Index. Select your Input pin as Virtual with a value. For this, we set our UV Index value as V2. You can set any value number you want for your virtual pins. S the Reading rate as PUSH.

4. Repeat steps 2 & 3 and create displays for UVA and UVB
Step 4 Upload code
After setting up your Blynk, you need to provide some code to your board for the data to be read and the sensor to provide data to your Blynk app. Download and open the Blank template code.
Set the Auth token of your Blynk App on your code. Set your WiFi credentials.
In void loop() type the following code:
Serial.print("Raw UVA reading:  "); Serial.println(uv.readUVA());

Serial.print("Raw UVB reading:  "); Serial.println(uv.readUVB());

Serial.print("UV Index reading: "); Serial.println(uv.readUVI());
Then type the following code in void sendData() that lets you display the above info to your Blynk app:
Blynk.virtualWrite(V0, uv.readUVA());
Blynk.virtualWrite(V1, uv.readUVB());
Blynk.virtualWrite(V2, uv.readUVI());
Type in the virtual pin value that you have set according to your display for your Blynk app.
Step 6 Run your code and you’re all set to marvel at your awesome project~
You will be able to get readings of the UVA, UVB and UV Index from the device to your app!
Here’s the full code of the above project
And that’s it!
Congratulations! You now have created a device and app to detect UV Sensor!
You can also download the full source code for this project from our github page.
In the meantime check out our other awesome and cool Zio projects to give you that qwiic inspiration!