


DHT11 Temperature and Humidity Sensor with an Arduino Uno
Here we’ll introduce how to get started with a DHT11 sensor so you can incorporate it into your projects. It’s super simple to start-up and will get you moving onto adding components in no time.
The DHT11 sensor is an easy way to quickly measure surrounding air temperature and humidity. It’s a great little device to slip into environmental control systems, weather stations, and garden monitoring systems. For this introduction, a DHT11 sensor pre-mounted to a PCB was used which eliminates the need to manually place a 10k Ohm resistor and an additional unused pin.
Hardware
- DHT11 sensor
- Arduino Uno
- Dupont wire
Firmware
- Arduino IDE
- DHT11 Arduino Example Code
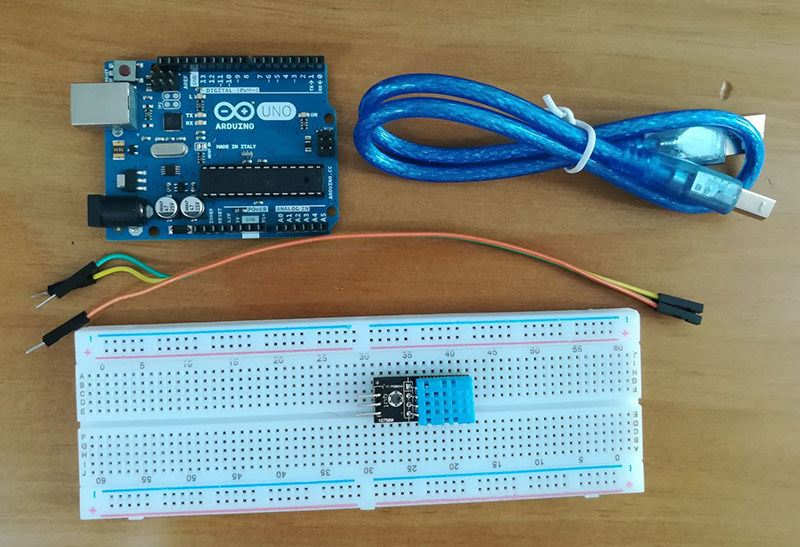
First, let’s hook up the sensor to the Arduino Uno. You don’t have to use a breadboard, but we did here.
Connection:
| DHT11 | Arduino Uno |
| GND | GND |
| VCC | VCC |
| Data | A0 |
{a picture for connection}
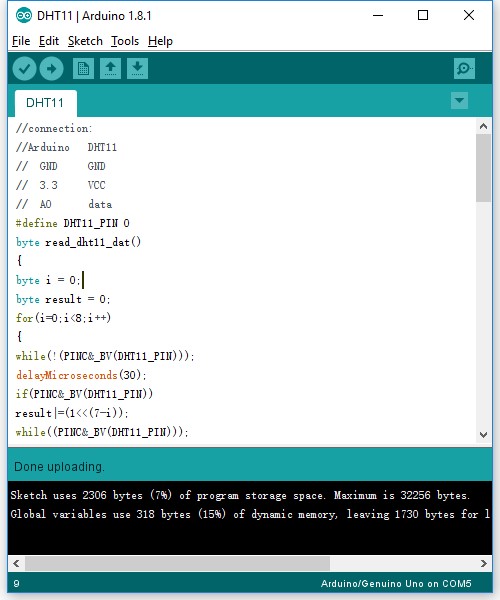
Next, let’s run an example code
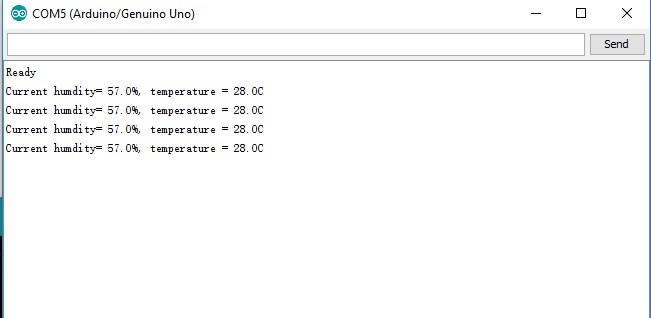
Open the serial monitor:
We recommend downloading the DHT11 library for future use of the sensor.