


E-ink module connect to Internet
In this tutorial for Part 3 of How to - E-INK E-PAPER DISPLAY MODULE, I am going to share with you how to connect your E-Ink Display Module to a WiFi module which enable updates the texts via WiFi.
Don’t have an E-Ink Display Module? You can get one here from Smart Prototyping: http://bit.ly/EInkModule
Let’s get started.
Step 1: Hardware & Software Required
The HARDWARE needed:
- Espresso Lite V2.0
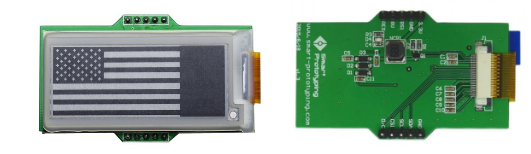
- E-Ink Display
- FTDI Tool
The SOFTWARE needed:
- E Ink Library
- Arduino IDE 1.6.12
Step 2: Hardware Connection
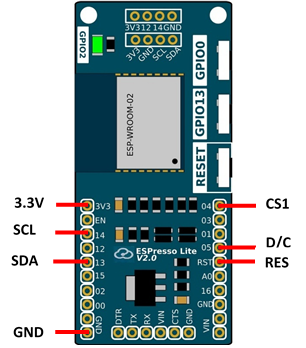
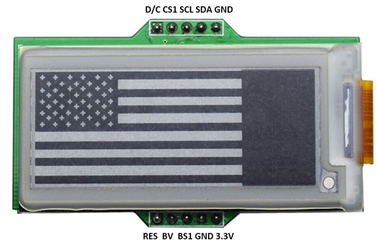
Connect the E-Ink Display Module to the Espresso Lite V2.0 as shown in the connection diagram. For detailed pinout of Espresso Lite V2.0, you may refer to HERE.
Step 3: Install Board Support Package for Espresso Lite V2.0
There are many online articles on how to install the board support packages for Espresso Lite V2.0 which is based on ESP8266. I found one which is pretty good. You can follow the steps here: http://www.espressolite.com/arduino-ide.
Step 4: Import Arduino Library
- Download the Modified Smart E-Ink Library as a .zip file.
- Open your Arduino IDE 1.6.12 and import the E-Ink Library into Arduino IDE.
- In Arduino IDE, go to Sketch > Include Library > Add .zip library
- Choose the SmartEink_Arduino_Library.zip file which you have just downloaded.
- You should see that the library is added successfully.
Step 5: Arduino Code
Download the EInk_EspressoLite.ino code. Load the code in Arduino IDE. Remember to change the SSID and password to match with your own network credentials.
Once you have selected the correct board (Espresso Lite V2.0) and correct COM Port of your device, proceed to upload it to your device.
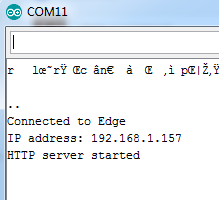
Once uploaded, open up the serial monitor and look for the IP Address when the device is connected to WiFi.
Copy the IP address and paste it into web browser.
When you paste the IP Address, remember to include the 8844 port number. You should see the below page loaded up.
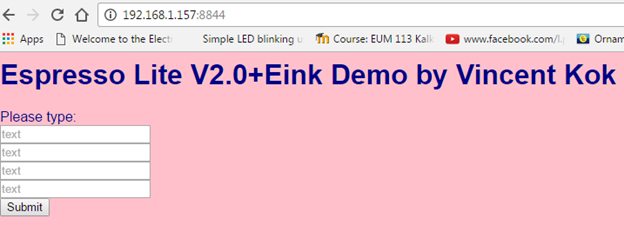
Type in any texts in the 4 rows of text boxes and proceed to click submit. You will see the changes reflect on your E-Ink Display Module. You have successfully updates the E-Ink through WiFi network.
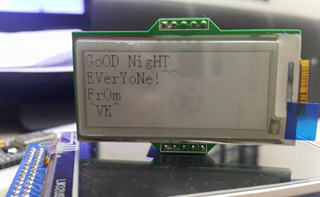
Example result on the E-Ink Display Module:
Now, the interesting thing is that, if you have a Static IP for your internet, or band a domain with your internet, you can tell the IP or domain address to your friend, your friend can send message via the web page and the message will show on the e-ink display.
Tutorial created by Vincent Kok and edited by NOA Labs.