


Raspberry Pi with Zio Qwiic Light Sensor TSL2561
This is a simple demo for how to make Raspberry pi work with Zio Qwiic light sensor TSL2561. The Qwiic ecosystem has a Pi hat which allows you to easily connect raspberry pi board with any Qwiic module without any jumper wire, just plug and have fun!
Hardware:
- Raspberry Pi (model 3 or 4)
- Qwiic Pi Hat
- Zio Qwiic light sensor TSL2561
- Qwiic Cable
Step 1 Setup the Raspberry Pi
Check out this super quick video on how to setup the Raspberry Pi.
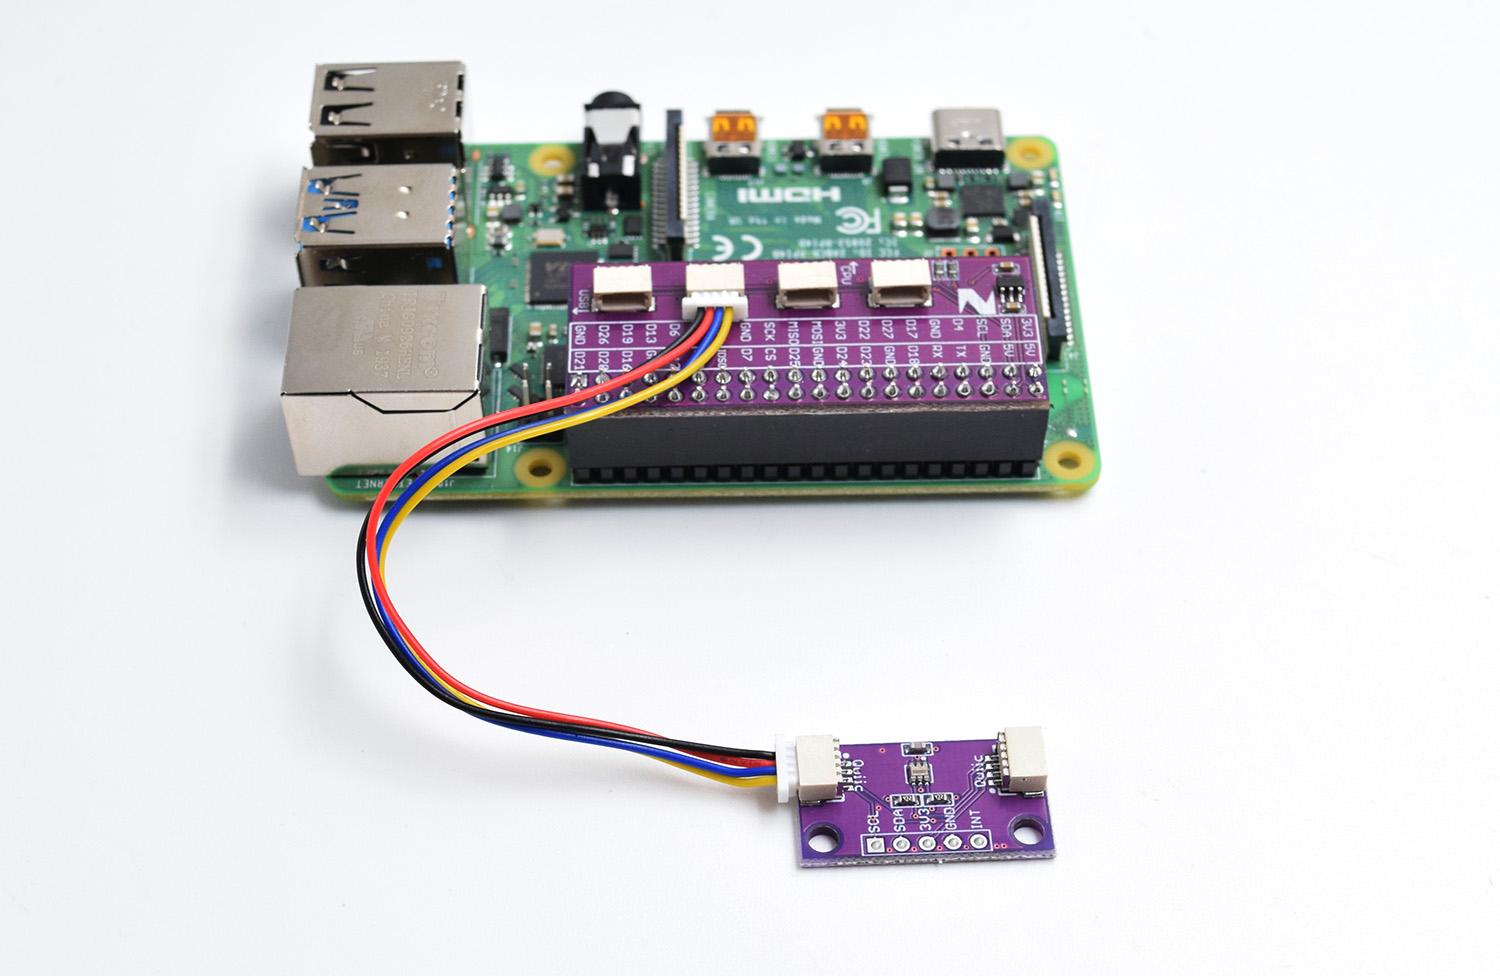
Step 2 Connect
Connect the Zio development board with TSL2561 Light Sensor to the Raspberry Pi via the ZIO QWIIC HAT.
Step 2 enable the I2C bus
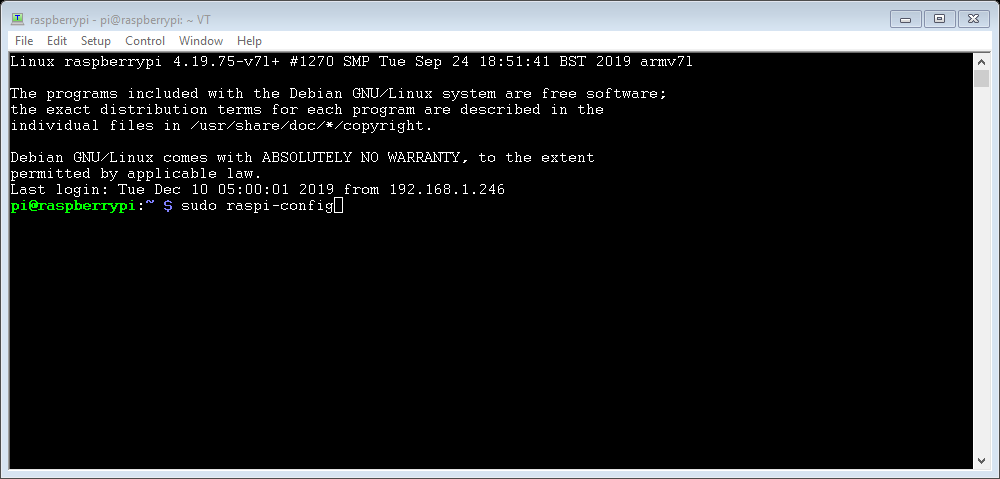
Either from the Raspberry Pi’s desktop or via SSH, Open the terminal and type in:
sudo raspi-config and press enter
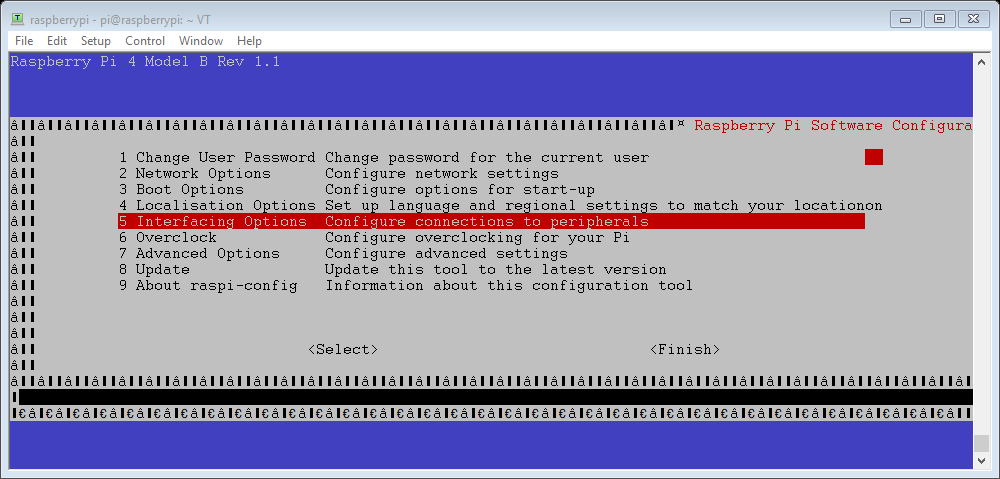
Using your keyboards arrow keys, select ‘5 Interfacing Options’ and press enter.
Scroll down to ‘P5 I2C’ and press enter.
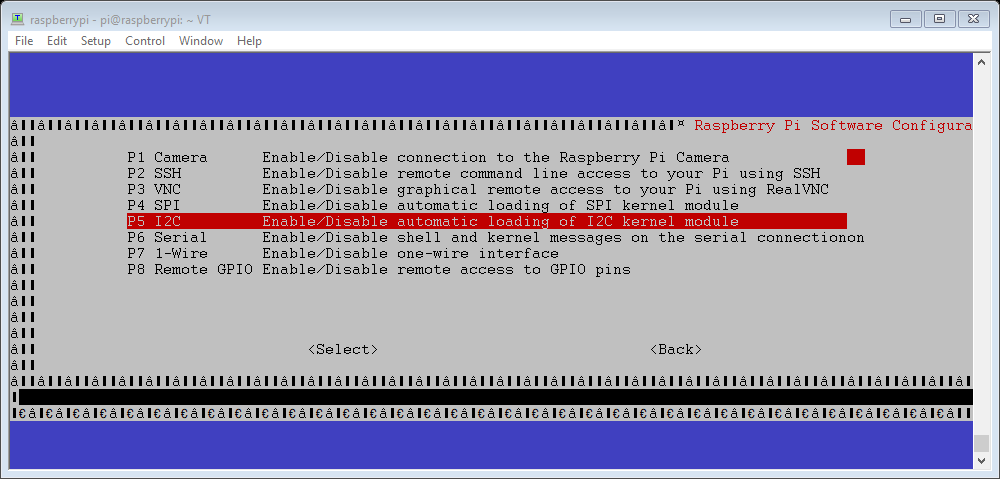
Then select ‘<Yes>’ and press enter to enable the I2C interface for the ZIO QWIIC ecosystem.
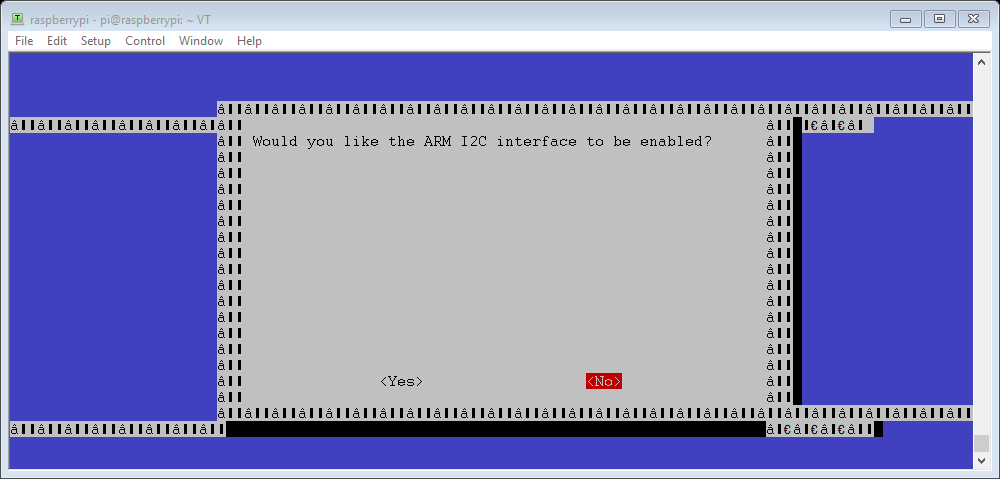
Select ‘<Ok>’ and ‘<Finish>’ to return to the terminal.
Step 3 Download python script
Whilst still in the terminal type:
sudo git clone https://github.com/machineshopuk/TSL2561
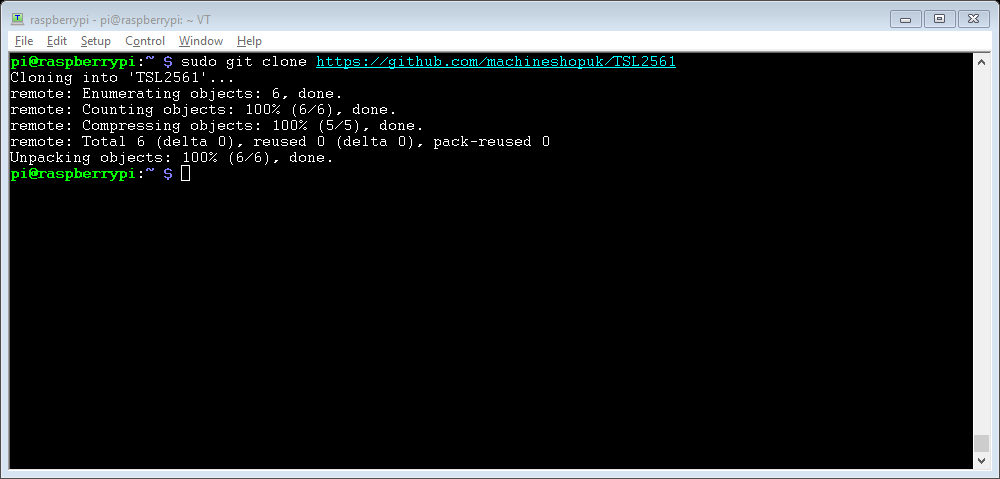
This will generate a folder called TSL2561, enter it by typing:
cd TSL2561
Then run the script by typing:
python TSL2561.py
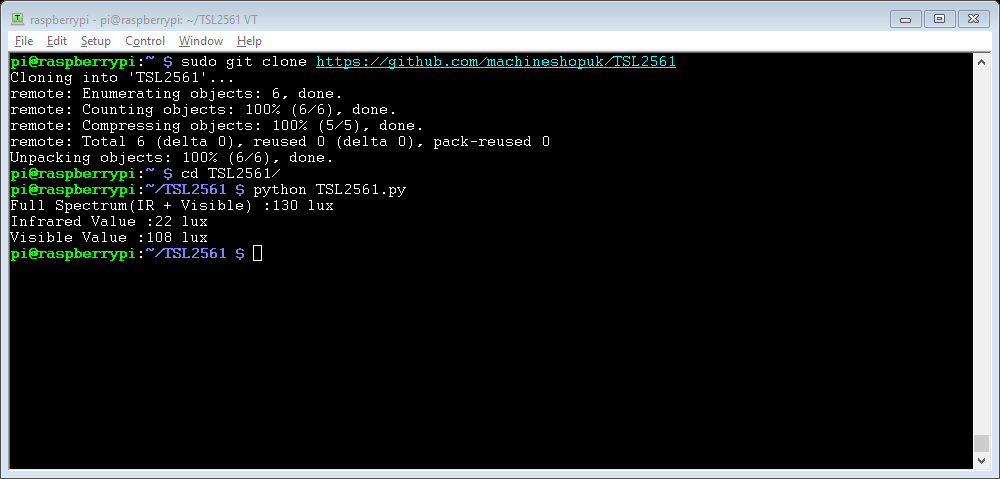
The script will output full spectrum, infrared and visible light values to the terminal.