
")

")
")
Zio Loudness Sensor Qwiic Start Guide
21/02/2019
This post is part of our Zio Qwiic Start Guide Blog Series.
Table of Contents
Introduction
This sensor is used to detect the sound environment. It's value output in ADC (0-1023), depends heavily on the distance between the sound source and sensor.
You can include this sensor in projects that need to measure environmental noise or include it in your Indoor/Environment projects to measure or monitor noise level thresholds.
To measure the values in decibels (dB) you need to convert the ADC in dB by calibrating your ADC values against an SPL (Sound Level) meter. You can check out the Arduino forum that explains how to convert ADC into dB for sounds.
Commonly found in premises like Entertainment complexes, pubs, concert areas that frequently play loud music or even in factories where loud sounds from types of equipment play a major impact in the quality of work environment.
Zio Loudness Sensor Overview
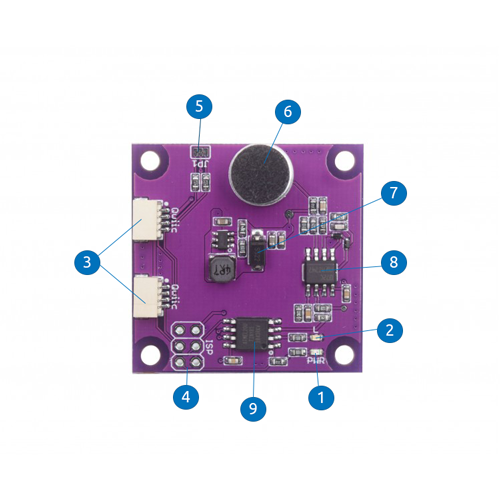
- Power LED
- Light LED
- Qwiic Connector
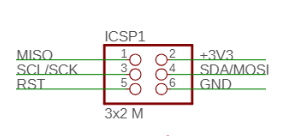
- ISP Pins
- I2C Pullup Resistor (JP1)
- Loudness Sensor Microphone
- SS2 Barrier Rectifier Diode
- TL072DCT Amplifier
- ATTINY85-20SMT Main IC
Configuring your Loudness Sensor
Difficulty Level:
Helpful Resources:
This qwiic guide has a separate post on our development board guides. Check them out below:
Connection Set up
Setting up our Zio Loudness Sensor with Zio Development boards is easy thanks to the Qwiic connector system installed with the boards. There is no complication in wiring mistakes as you only need Qwiic cables to daisy chain them together and you're all set to code your sensor.
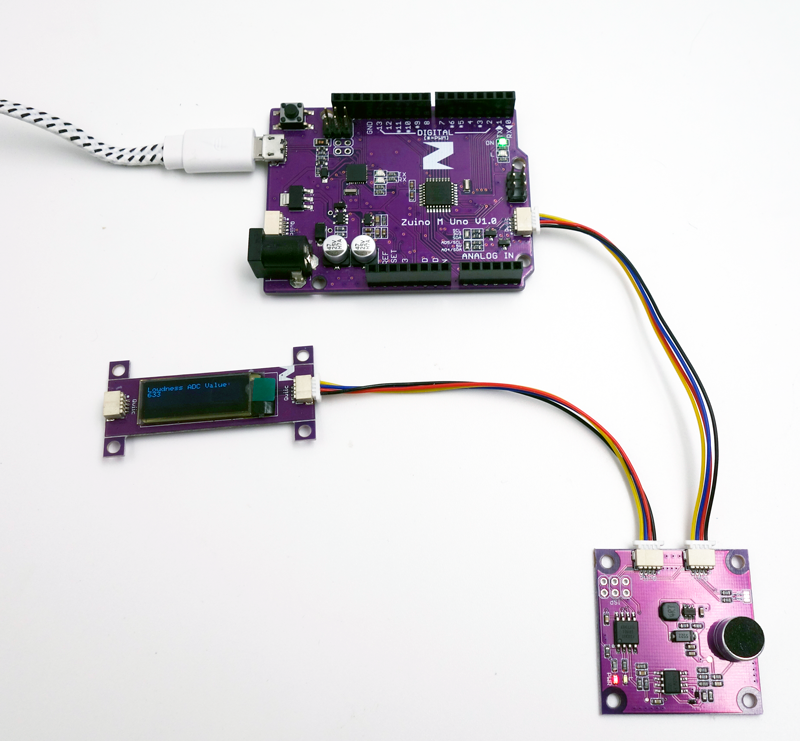
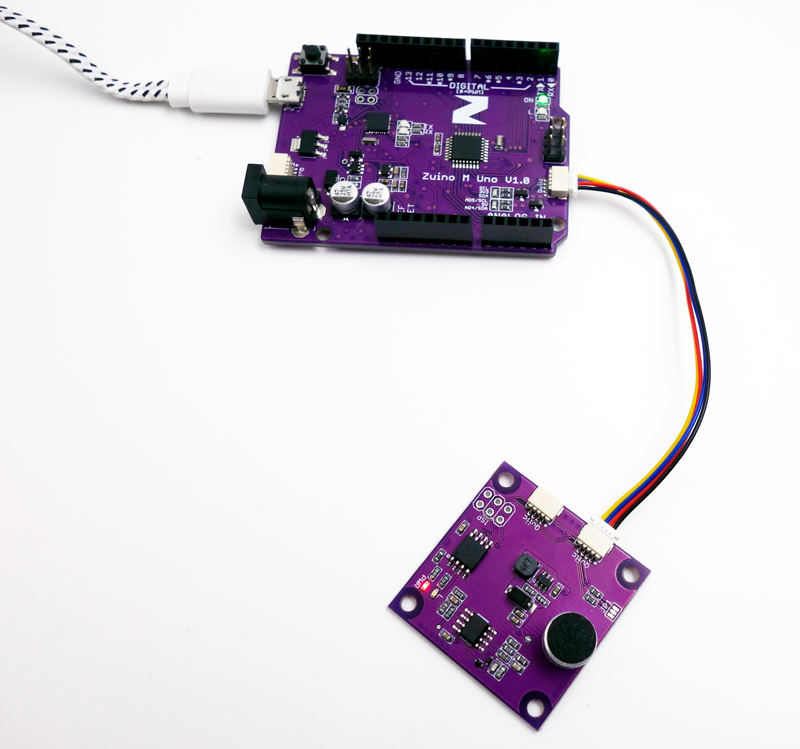
Connection with Zuino M Uno
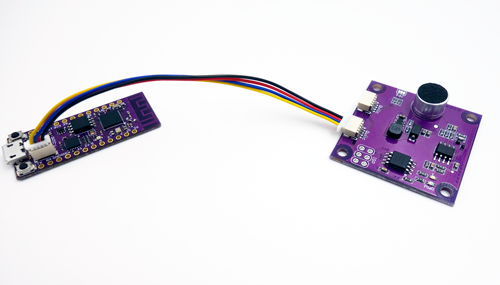
Connection with Zuino XS PsyFi32
Testing Example Codes
We are going to demo our Loudness sensor using the following example codes. The following examples work with our Zio development boards. Just select the right board and port from the Arduino IDE platform.
Download the example codes here. Extract and copy the Qwiic Loudness Sensor Examples folder into your Arduino ‘examples’ directory.
1. Basic Reading
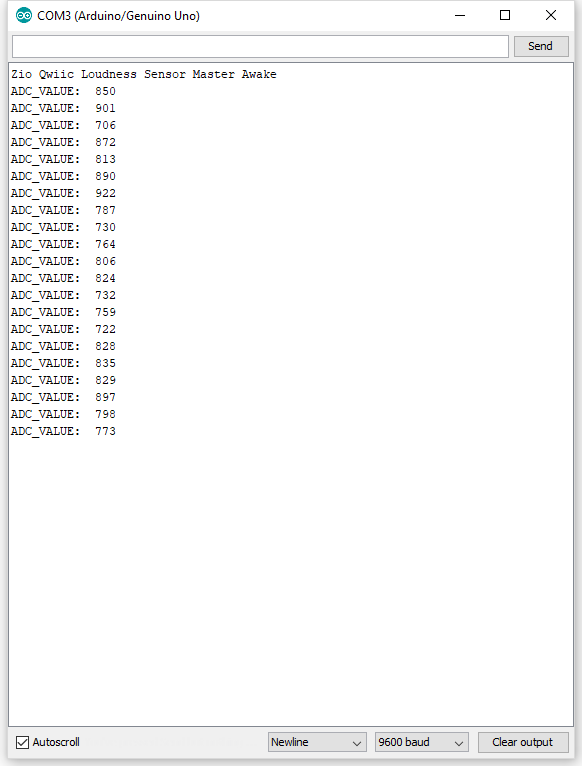
The following example will test the basic reading of the Loudness Sensor. The sensor will detect sounds and output the value in ADC where 1023 value indicates high threshold.
Open your Arduino
Go to File > Examples > Qwiic Loudness Sensor Examples > Example1- Basic _Reading
Upload the code to your development board. And open Serial editor to view the results.
2.OLED Example
We will do a demo test using Zio Qwiic 0.91in OLED Display and display basic reading test. For this example code, we will use Adafruit’s library and example code. You should have installed the Adafruit library below:
We also have a separate blog post and qwiic start guide for our OLED display. You can check it out here.
Open your Arduino
Go to File > Examples > Qwiic Loudness Sensor Examples > Loudness _Sensor_OLED
Upload the code to your development board. Your OLED will display the ADC value of your Loudness sensor.