


")

")
")

Zio PM 2.5 Air Quality Sensor with Adapter Qwiic Start Guide
This post is part of our Zio Qwiic Start Guide Blog Series.
Table of contents
- Introduction
- Overview of PM2.5 Sensor
- Configuring your PM2.5 Sensor
- Difficulty Level
- Helpful Resources
- Installing Libraries
- Connection Set up
- Testing Example Codes
Introduction
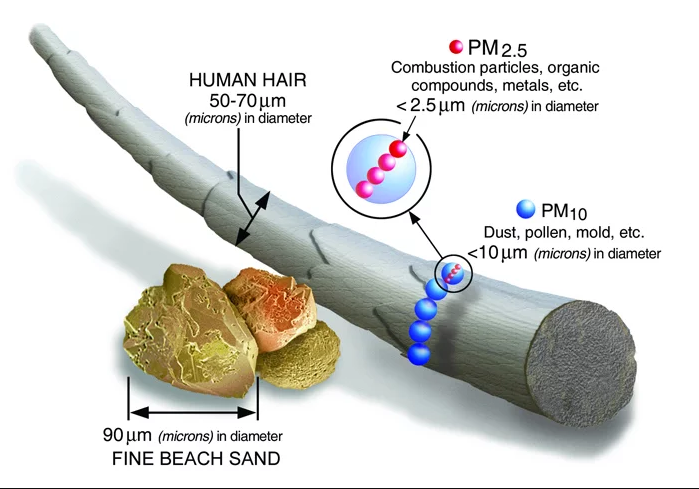
PM2.5 sensor detects Particle Matter (PM) in micrometres (abbreviated as µm) or microns; both terms are a unit of length defined as one-millionth of a meter (10-6). Particle Matter is the combination of large and microscopic solids and liquid droplets found in the air commonly grouped into 2 categories: those smaller than 2.5 µm and those smaller than 10.0 µm.
PM2.5 Sensor helps measures the air quality that we breathe as PM can cause adverse effects to our health due to its microscopic size that can be easily inhaled into our lungs.
This beginners guide will demonstrate how you can measure the air quality surrounding you with our latest Zio Qwiic PM2.5 Air Quality Sensor.
Zio Qwiic PM2.5 Sensor with Adapter Overview
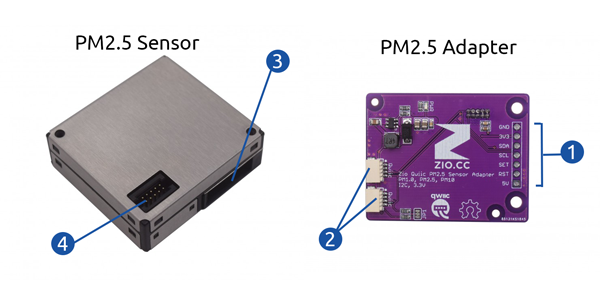
- Power and Logic Pins
- Power Pins: GND, 3V3, 5V
- Logic Pins: SET, RST
- Signal Pins: SDA, SCL
- Qwiic Connectors
- Like other Zio Qwiic boards, it incorporates the Qwiic connector for it’s convenient and practical setup
- PM2.5 Sensor fan
- The fan on the sensor needs 5V to drive it.
- PM2.5 Adapter connector pins
- 1.27mm 2x5 pin female header
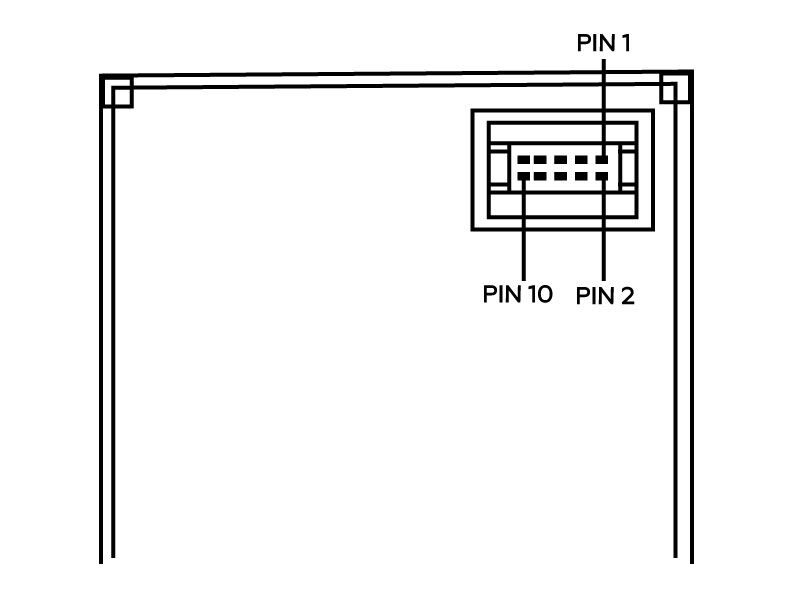
Pin 1---------- -------------------- VCC (5V)
Pin 2---------- -------------------- VCC (5V)
Pin 3---------- -------------------- GND
Pin 4---------- -------------------- GND
Pin 5---------- -------------------- Reset (TTL 3.3V)
Pin 6---------- -------------------- N/C
Pin 7---------- -------------------- SCL (I2C 3.3V)
Pin 8---------- -------------------- N/C
Pin 9---------- -------------------- SDA (I2C 3.3V)
Pin10-------- -------- ------------- Set (TTL 3.3V)
Configuring your PM2.5 Sensor
Difficulty Level:
Helpful Resources:
This qwiic guide has a separate post on our development board guides. Check them out below:
Installing Libraries
You need to install the following libraries to your Arduino IDE before you can start programming your Zuino board with Zio Qwiic PM2.5 Sensor.
Download the following libraries and save it on your local Arduino IDE libraries folder:
To install the libraries open your Arduino IDE, go to Sketch tab, select Include Library -> Add .Zip Library. Select the above libraries to be included on your IDE.
Connection Set up
Connection with Zuino M Uno
For connection using PSyFi32 (ESP32) go here.
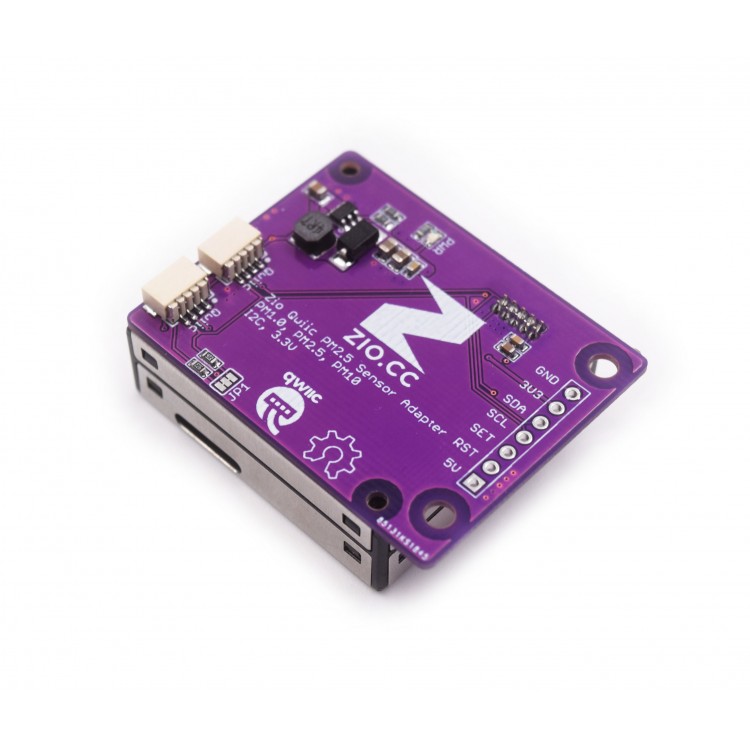
Step 1 Connect Adapter and PM2.5 Sensor together
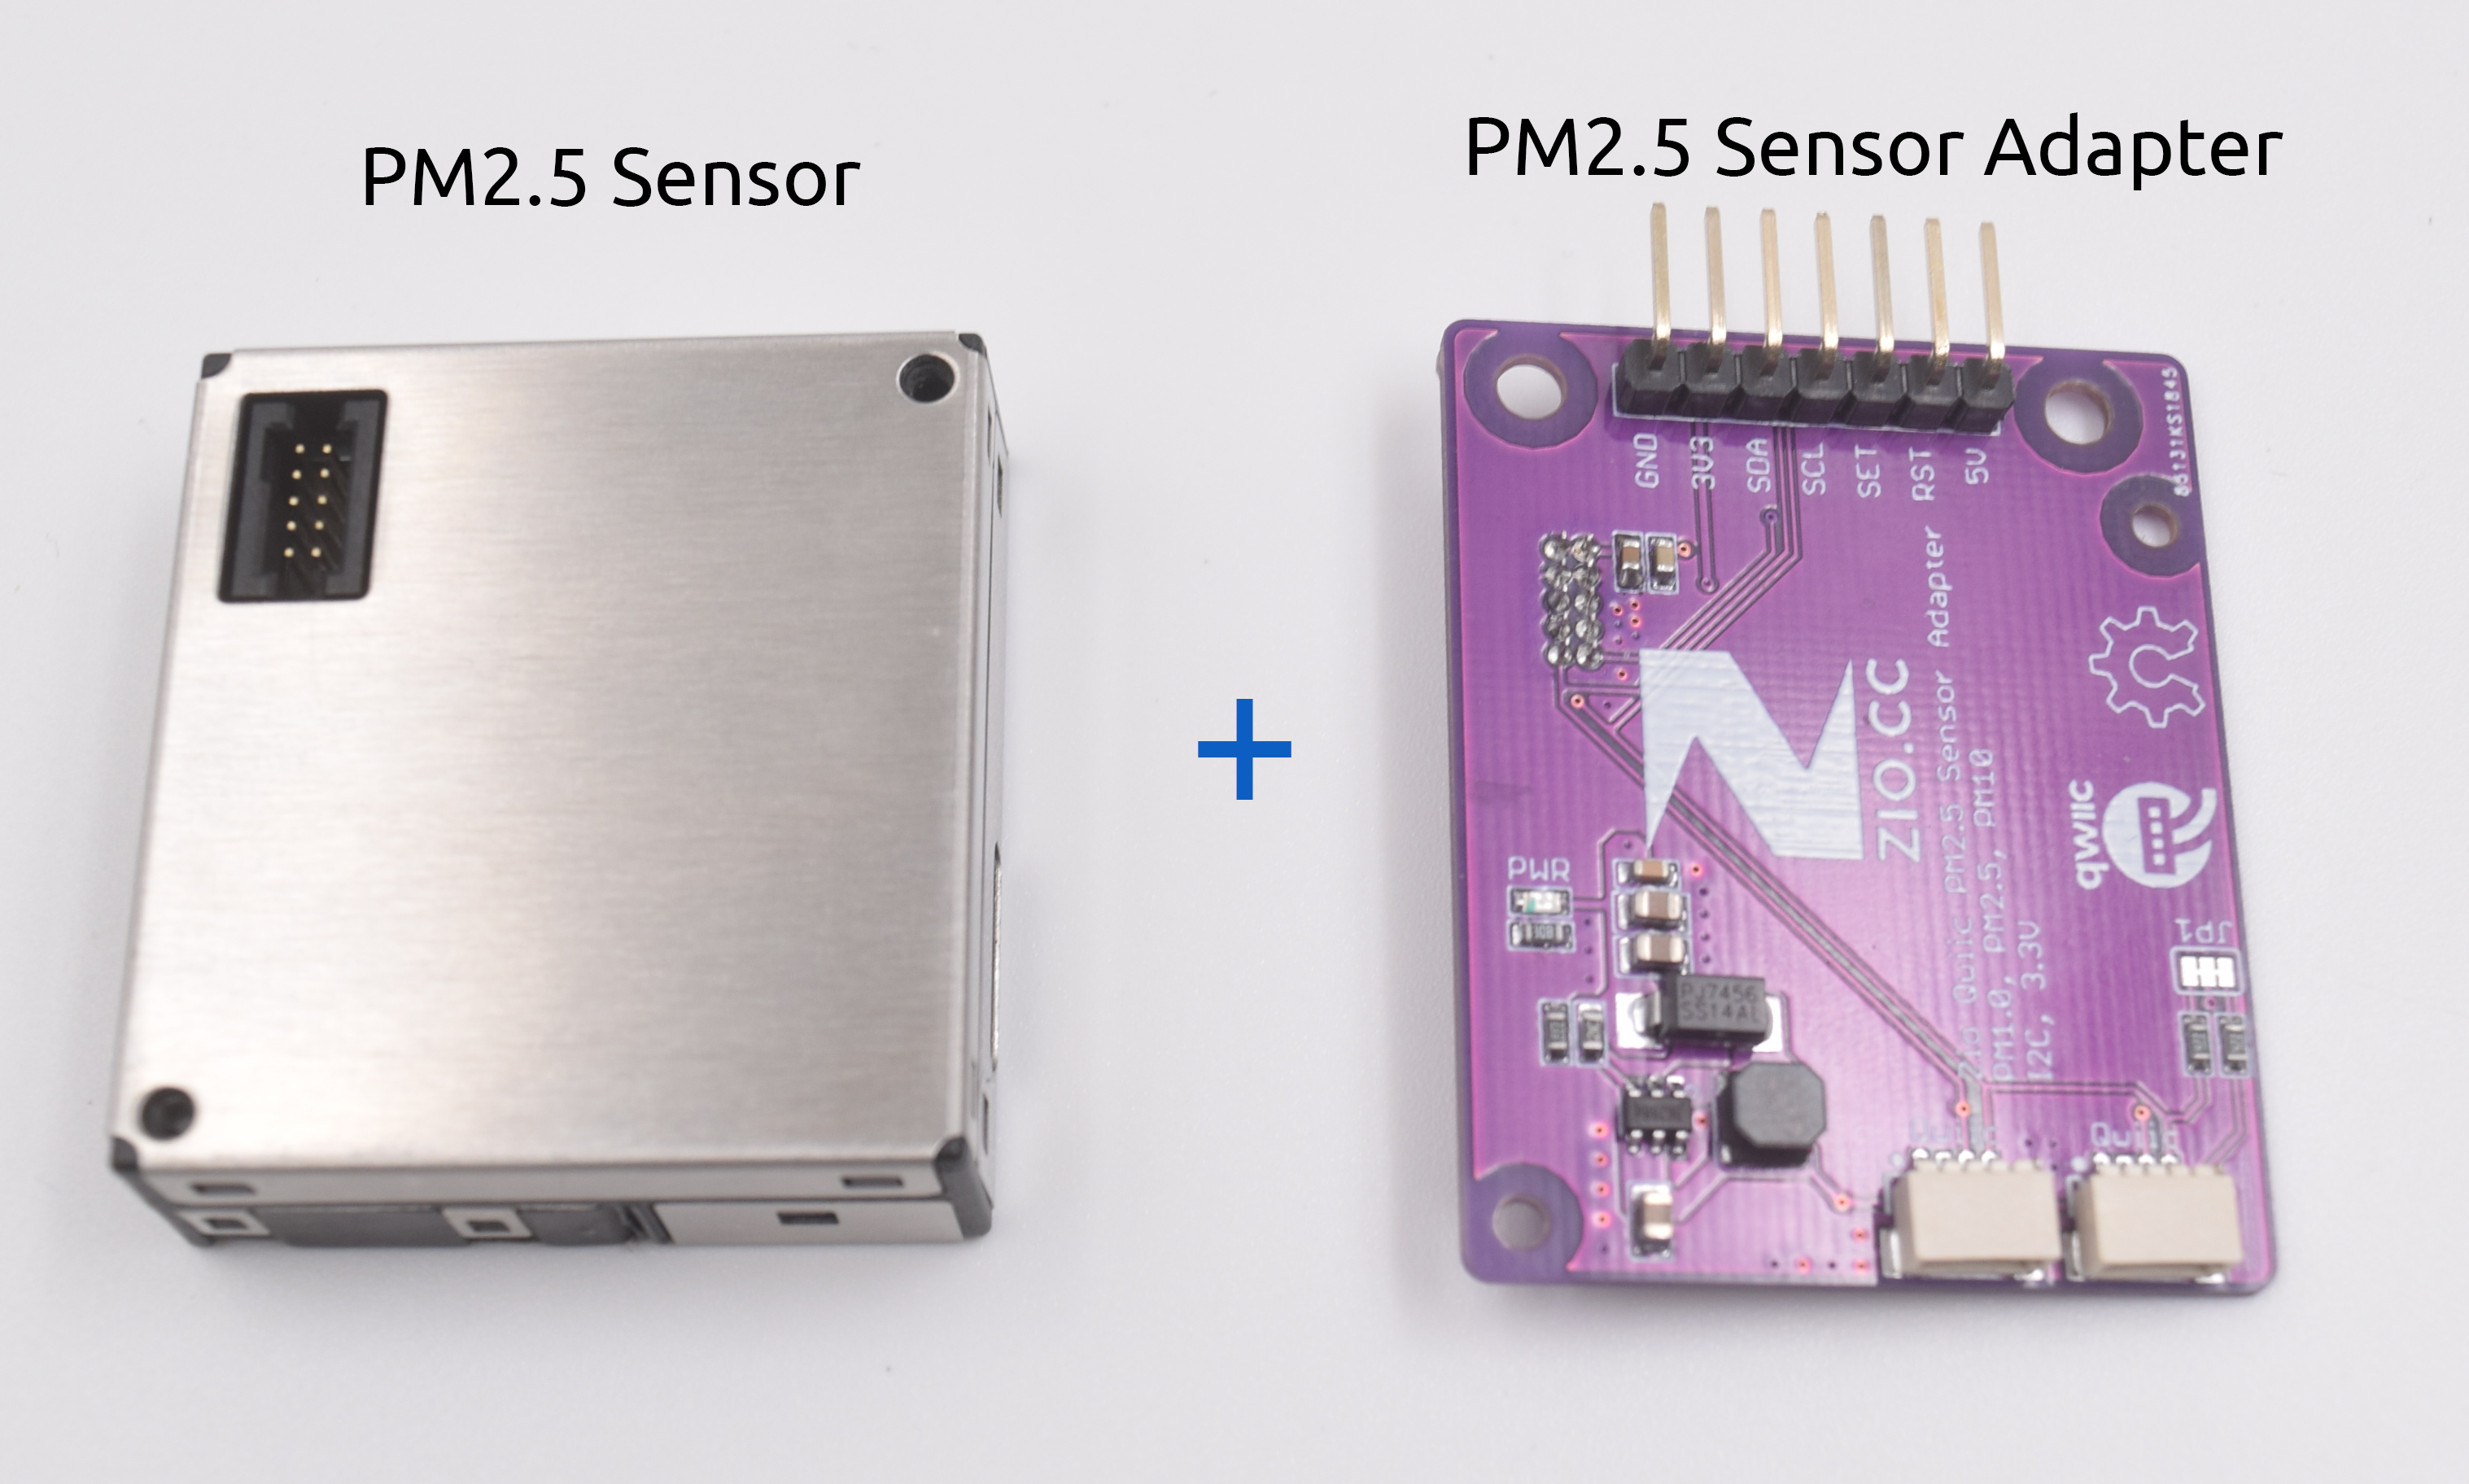
After attaching the adapter, your PM2.5 sensor will look as below:
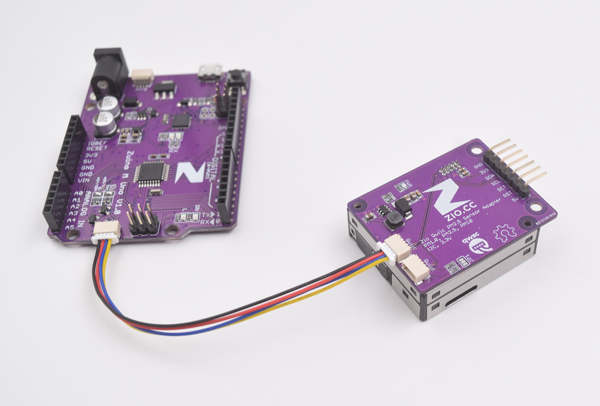
Step 2 Daisy chain the sensor to Zuino M Uno
Connection with Zuino XS PsyFi32 (ESP32)
For connection using Zuino M Uno go here.
Step 1 Connect Adapter and PM2.5 Sensor together
After attaching the adapter, your PM2.5 sensor will look as below:
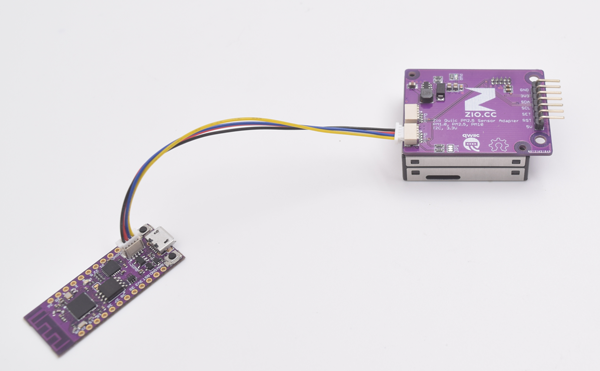
Step 2 Daisy chain the sensor to Zuino XS PsyFi32
Testing Example Codes
We are going to do the following example codes to demo our PM2.5. The following examples work with both our Zio development boards. Just select the right board and port from the Arduino IDE platform.
Open the demo code PMSA0031 file. You can download the code from our Github page here.
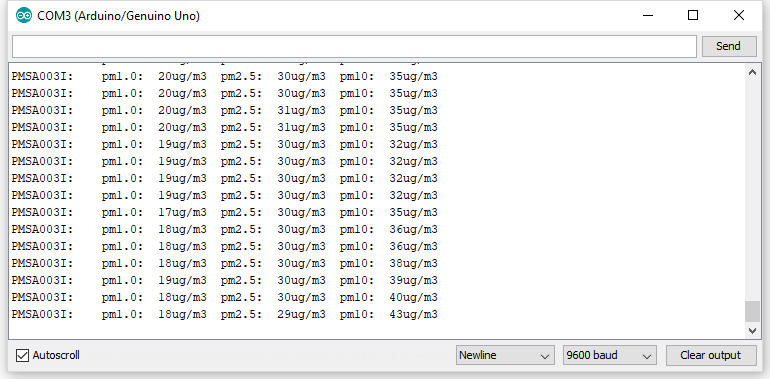
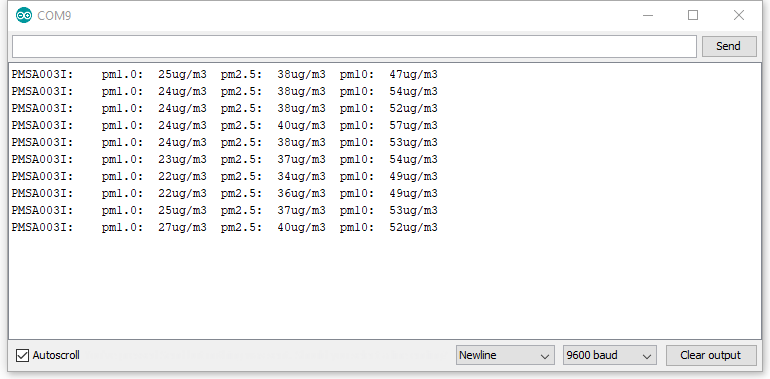
The following example codes will output Particle Matter in PM1.0, PM2.5 and PM10 respectively.
Open serial monitor and it will display the PM rate of your Air Quality.
Demo code with Zuino XS PsyFi32
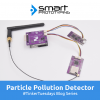
Check out this project blog on building your very own PM Detector using Lora, Uno and PsyFi32 with an OLED display.
Do check out our other Projects and Tutorial blogs to give you that qwiic inspiration!
Got questions or suggestions? Or just want to greet us? Drop us a comment below!