


")
")
")
")

Zio Soil Moisture Sensor Qwiic Start Guide
This post is part of our Zio Qwiic Start Guide Blog Series
Table of Contents
- Introduction
- Configuration
- Difficult Level
- Pre-requisites
- Hardware
- Software
- Setting up
- Basic Reading
We are so excited to introduce the soil moisture sensor to the Zio Qwiic family. This amazing board did just as it says - it detects the moisture level of your soil. What does that mean, you ask? Well to put it simply, it is intelligent enough to let you know whether your plant needs the H2O content or not. Best thing is, it is qwiic enabled - no soldering required~
You can build your very own automated home watering plant system with this sensor combined with our Zio development boards, it will be a cool project you can call your own.
Specifications:
Operating Voltage - 2.7- 5.5V
Atmel ATtiny85-20-SMT
Qwiic Connector System
ENIG Surface Plating
Overview
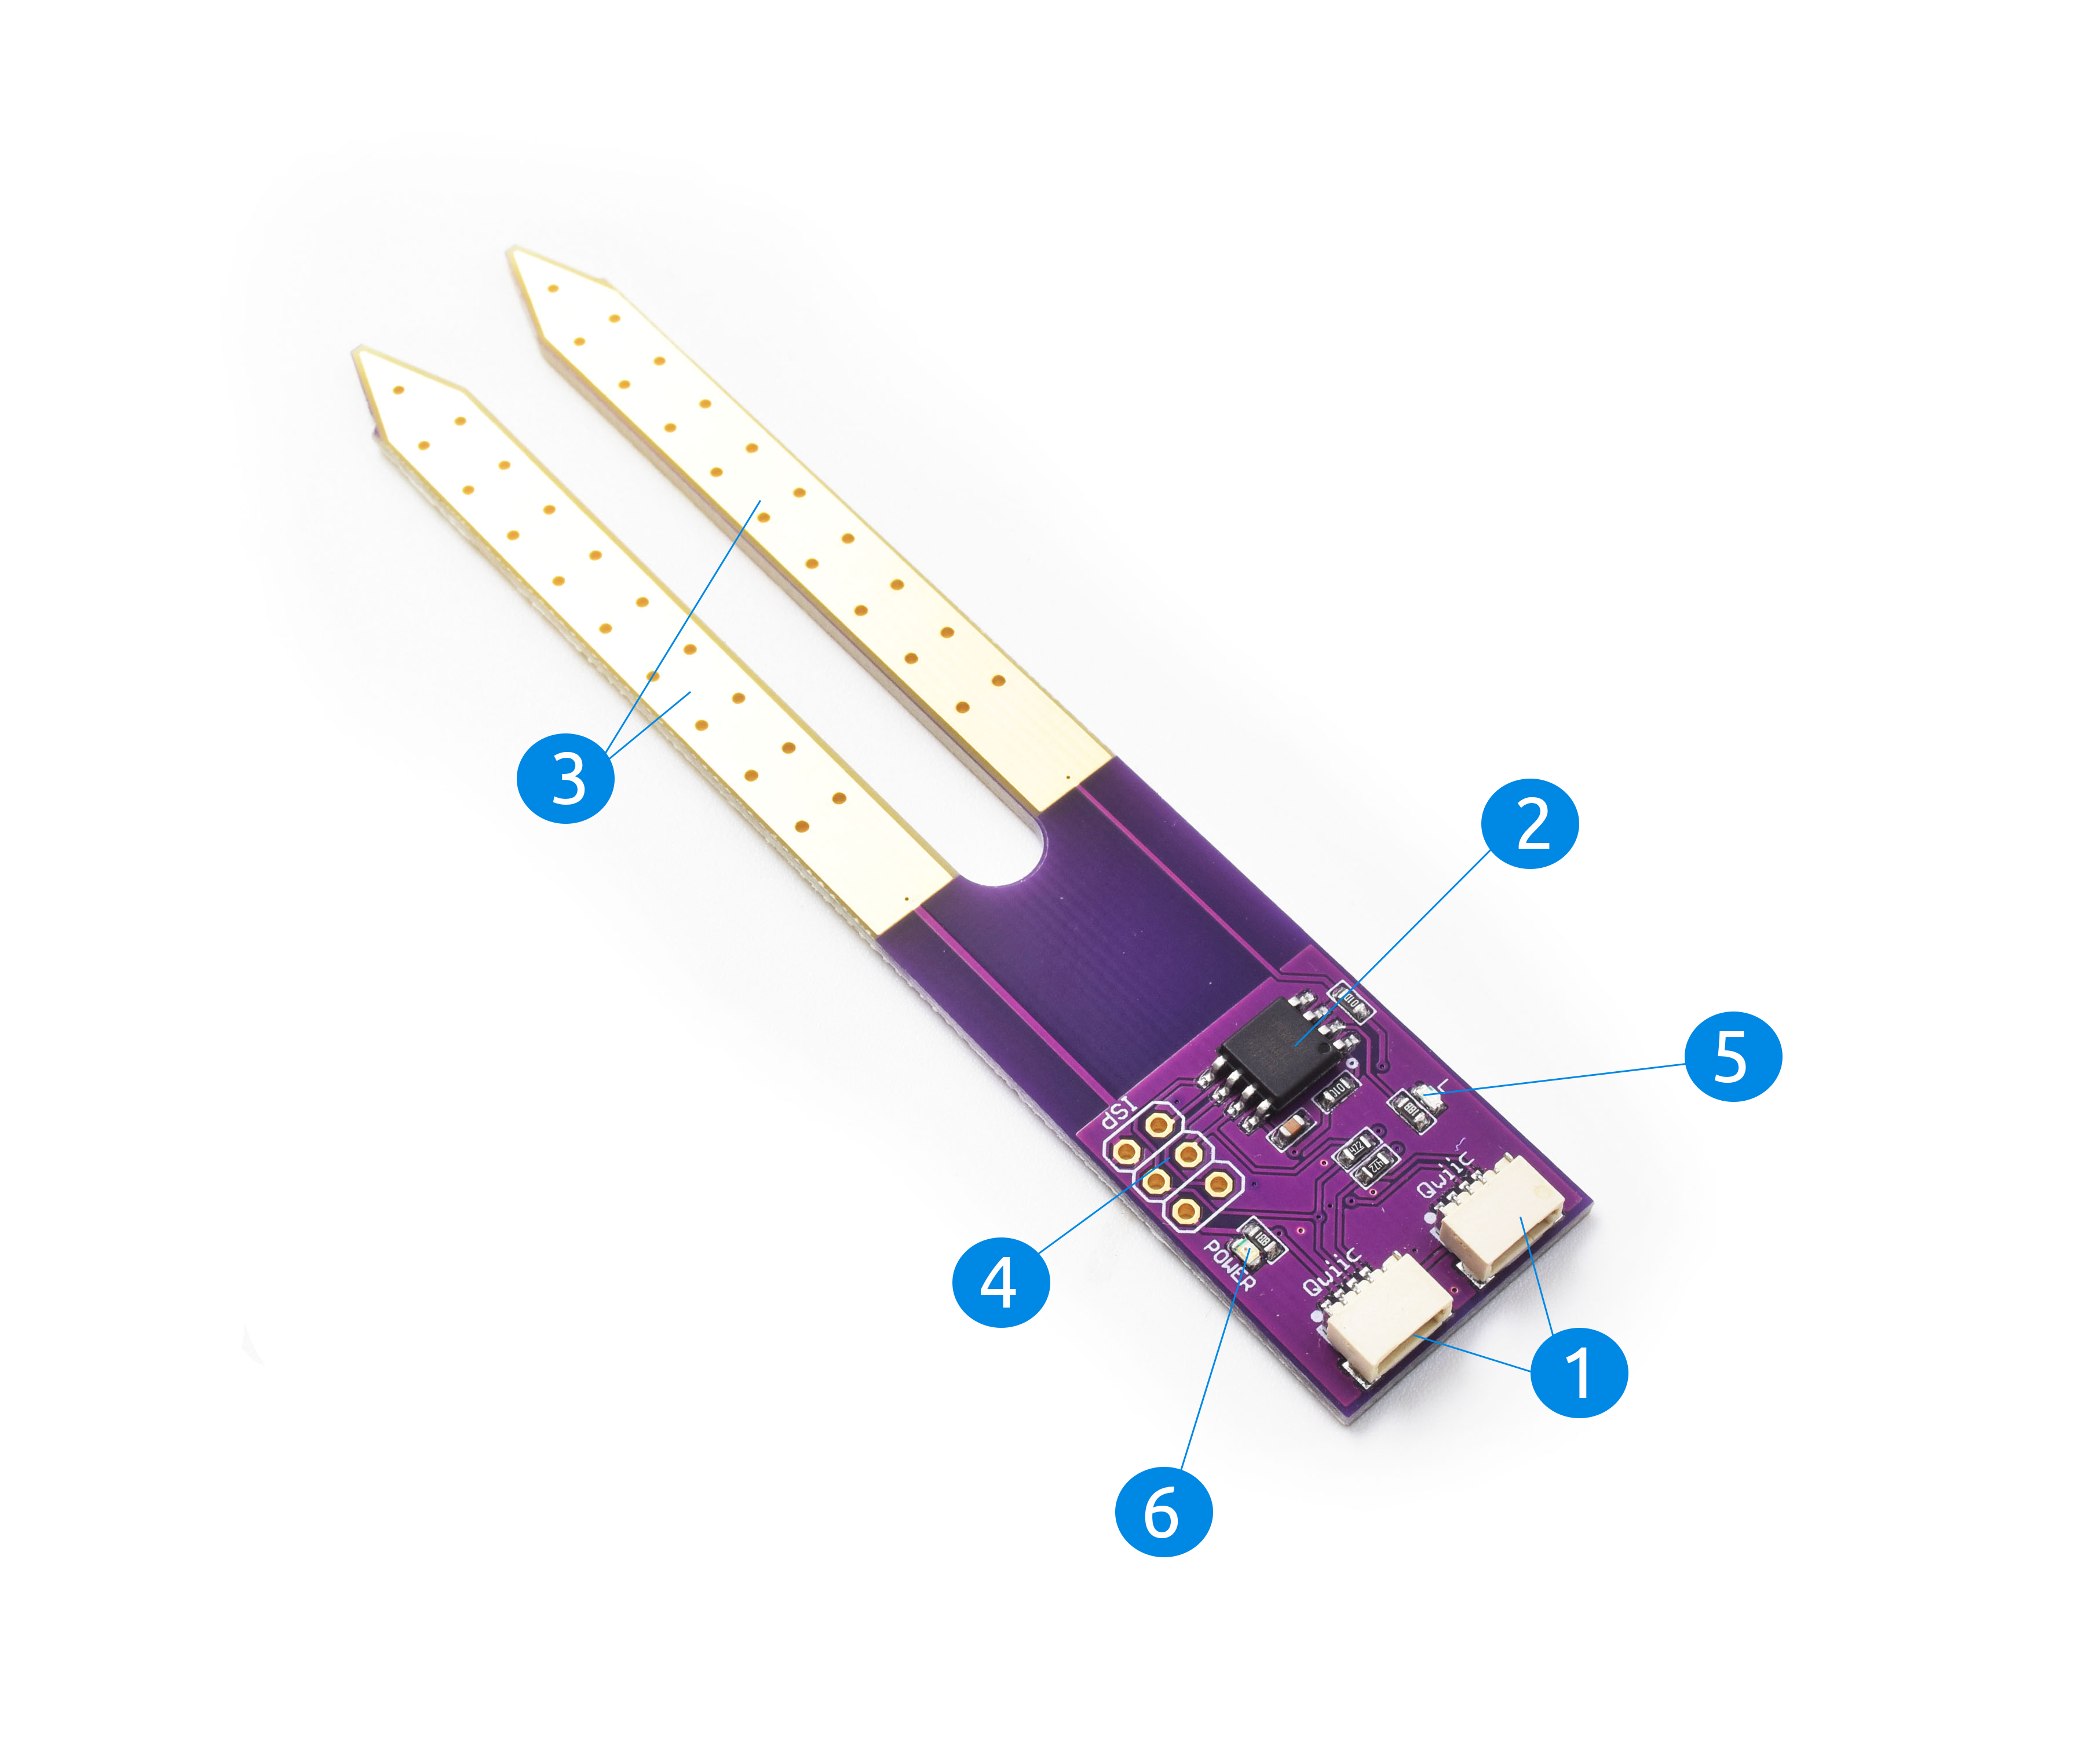
Qwiic Connector
Our sensor, like most others, is incorporated with the Qwiic Connector System. We can safely say that, to date, this is the first of its kind that incorporates qwiic technology in the market. Qwiic is an ecosystem of I2C sensors, actuators, shields, and cables that make prototyping faster and less prone to error.
We have a separate page dedicated to explaining what Qwiic connector is. You can learn more about it here.
MCU - ATMEL ATtiny85
We incorporate high performance, low powered CMOS 8-bit microcontroller from ATMEL. This ATtiny85-20-SMT chip uses Advanced RISC (Reduced Instruction Set Computing) Architecture mostly found in Apple products. It is also capable of capacitive touch sensing, which is needed with our sensor to detect moisture levels. You can refer our datasheet for the full features of this MCU.
ENIG Surface Plating Sensor
There is a lot of Soil moisture sensor out there in the market. But not all sensors use ENIG (Electroless nickel immersion gold) surface plating which is very useful in preventing oxidation. That is why our sensor spike is finished with a beautiful gold coating. We wanted to provide peace of mind to our users that our sensors have a longer lifespan than most sensors without the gold finishing.
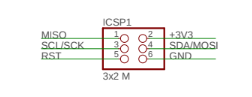
ICSP (In-circuit Serial Programming)
We created this sensor with the main objective that although it is very handy for qwiic enabled components and modules, we also want it to be useful to non-qwiic enabled components and modules too. Hence, the ICSP headers are there specifically for this purpose.
You can connect our sensor with any development board or modules that do not incorporate qwiic connector system. Here’s a pinout of the ICSP:
LED Indicator
This is something you will rarely see in a soil moisture sensor. What this does is to provide an LED indicator (with some coding) that will ‘blink’ telling you that your soil is in need of hydration or not. The “severeness” depends on how slow or fast your LED ‘blinks’.
Power Indicator
Like most of our Zio boards, our Soil moisture sensor is also preinstalled with a Power indicator. This just lets you know if your sensor is connected or not. To know if your sensor is working fine, the Power LED indicator should light up normally.
Configuration
Difficulty Level:
Helpful resources:
You should have a basic understanding of how to install Zio development boards. In this tutorial, we assume that your development board is already configured and is ready to be set up with our Soil Moisture Sensor. If you haven’t configured your board yet check out our development boards Qwiic Start Guide tutorial first:
Zio Zuino PsyFi32 Qwiic Start Guide
Zio Zuino M UNO Qwiic Start Guide
Hardware:
1. Zio Zuino PsyFi32 or
4. Qwiic Cable


Software:
Zio Soil Moisture Sensor Firmware
Setting Up
Setting up our sensor is pretty easy. Follow the following steps to get started:
1. Setting Up with Zuino M UNO
Step 1 Connect Zio development board with Sensor
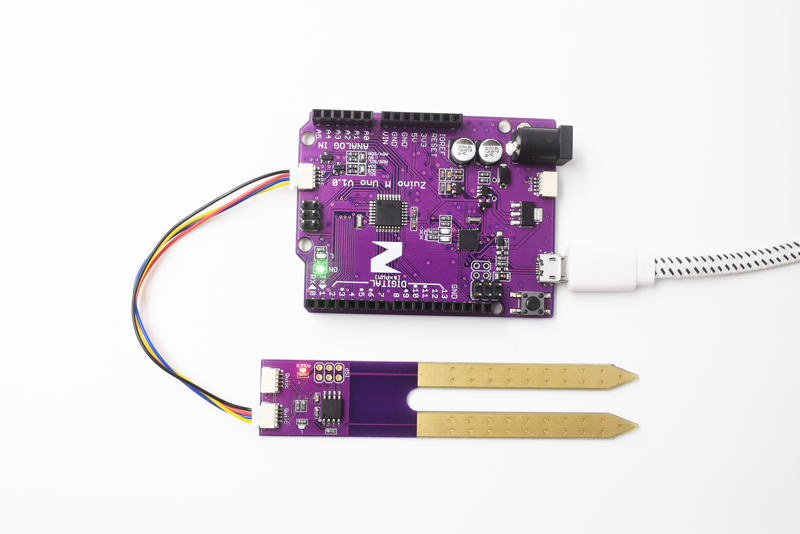
Step 2 Upload code
Download and open the Soil Moisture Sensor Firmware.
Follow the Basic reading steps below to test your soil moisture sensor.
2. Setting Up with Zuino PsyFi32
Step 1 Connect Zio development board with Sensor
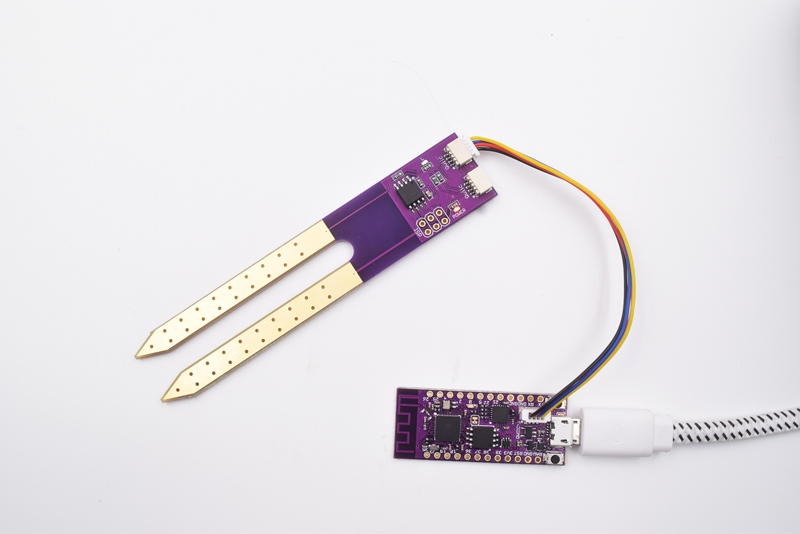
Step 2 Upload code
Download and open the Soil Moisture Sensor Firmware.
Follow the Basic reading steps below to test your soil moisture sensor.
Basic Reading
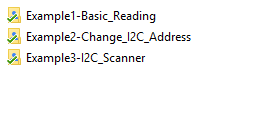
Step 1 Open the downloaded example codes for Zio Soil Moisture Sensor
Select Qwiic Soil Moisture Sensor examples

Choose example 1 - Basic Reading
Step 2 Select Basic Readings

Upload the code to your board.
In the void loop() section there is a function called, get_value() this is where your sensor will read the moisture level.
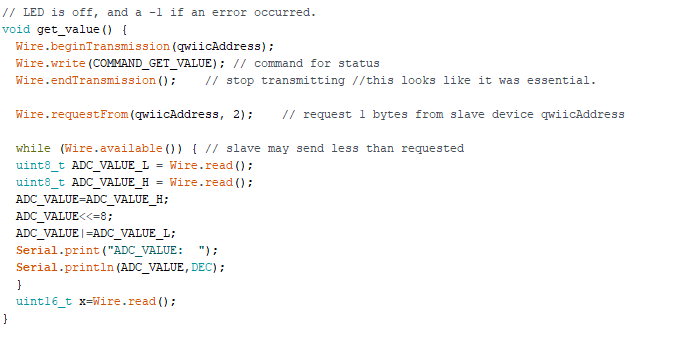
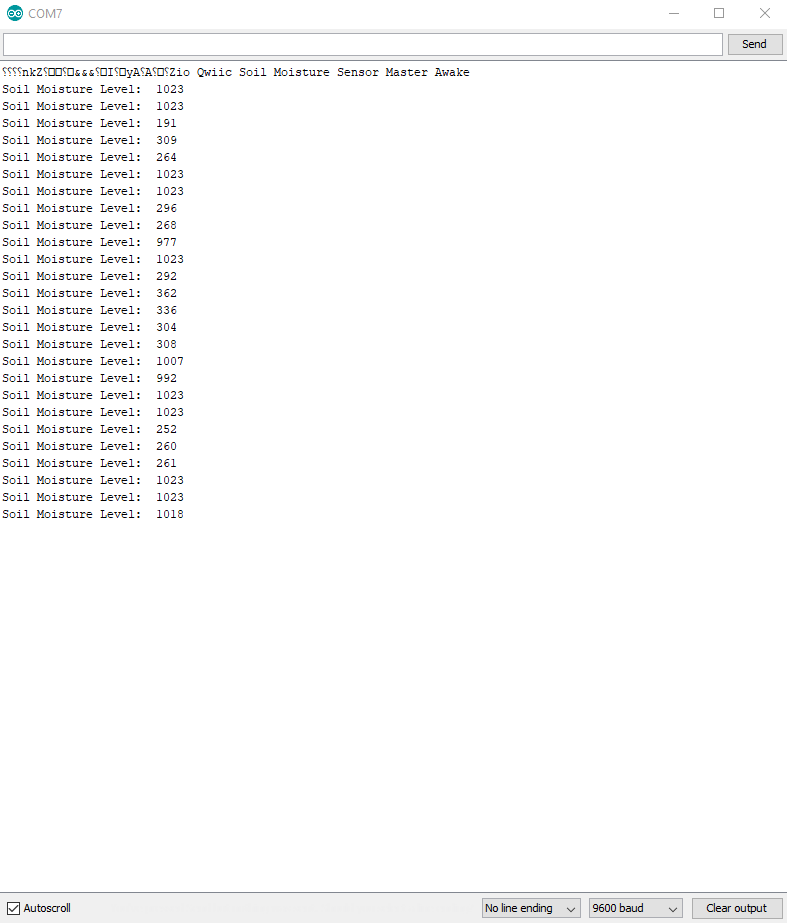
Step 3 Test your sensor
You will need to calibrate your sensor according to your plant's soil moisture. To do that insert the probes of the soil moisture sensor into your plant soil to check basic reading.
Open the Serial monitor to check the readings of your Dry and Wet soil captured by the sensor. Your serial monitor will list out the moisture level of your plant’s soil.
This value ranges from 0 - 1023:
A HIGH value indicates your soil is ‘Dry'.
A LOW value indicates your soil is ‘Wet’.
From the above values, you can calibrate your board to detect the value of moisture that is right for your soil so you can program your board sensor to automatically detect the dryness of your soil and warn you that it needs the required H2O.
You now have a basic understanding of how to set up your soil moisture sensor. In the meantime check out our other awesome and cool Zio projects to give you that qwiic inspiration!
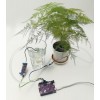
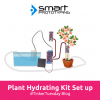
Want to build your very own automated watering plant system?
Didn’t know how to start and where to get one?
Our Zio Plant Hydrating kit will have you start building one in no time! Give your plant that H20 love it needs automagically with the kit! Purchase one (or more) here!