


")
")

")
")
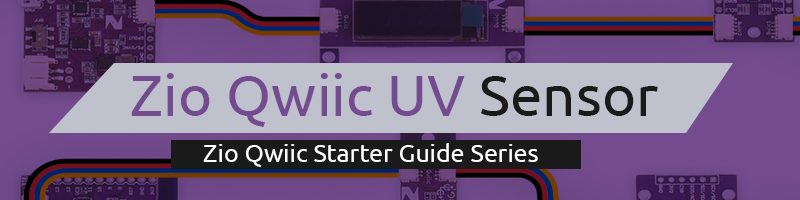
Zio UV Sensor Qwiic Start Guide
This post is part of our Zio Qwiic Start Guide Blog Series.
Table of Contents
- Introduction
- UV Sensor Overview
- Configuring your UV Sensor
- Difficulty Level
- Helpful Resources
- Hardware
- Software
- Setting up with Zuino M Uno
- Setting up with PsyFi32
- Setting up for OLED
Introduction
For those who are not aware, the function of the UV sensor is used for determining exposure to ultraviolet radiation in the laboratory or environmental settings. Things like the prevention of sunburns and skin blemishes by using UV sensors in wearable technology and smartphones have seen a growing interest in healthcare industries. In addition, there is a rise in UV sensors being used in many different applications, like automobiles, and robotics.
So now you know what is useful about UV Sensor, check out the guide below on how to use our Zio Qwiic UV Sensor.
Zio Qwiic UV Sensor Overview
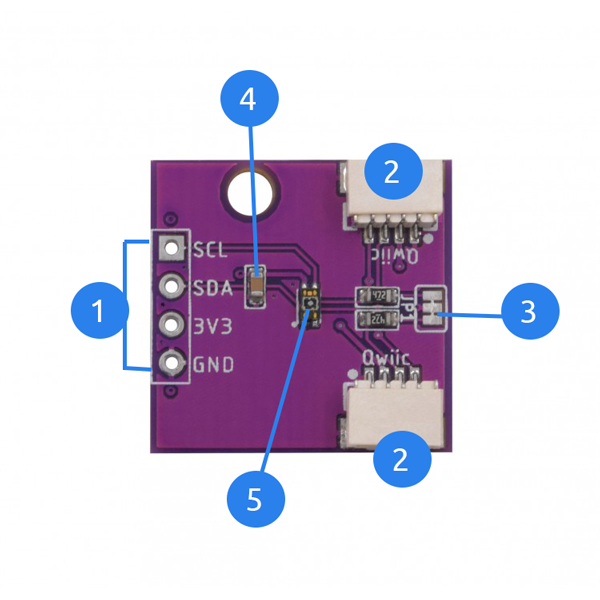
- I2C Power and Logic Pins
- Power Supply Pins : GND (ground) and 3V3
- Logic I/O Pins: SDA (Serial data) and SCL (Serial Clock)
- Qwiic Connectors : System to easily connect to other qwiic compatible modules using Qwiic cable
- I2C Pullup resistors
- I2C Address
- VEML6075 Sensor
Configuring your Zio Qwiic UV sensor
Difficulty Level:
Helpful Resources:
You should have a basic understanding of how to install Zio development boards. In this tutorial, we assume that your development board is already configured and is ready to be set up with our Motor Controller. If you haven’t configured your board yet check out our development boards Qwiic Start Guide tutorial below:
Zio Zuino PsyFi32 Qwiic Start Guide
Zio Zuino M UNO Qwiic Start Guide
Hardware:
Zio Zuino M UNO / XS PsyFi32
Zio Qwiic UV Sensor
Software:
Arduino IDE
Adafruit VEML6075 Library
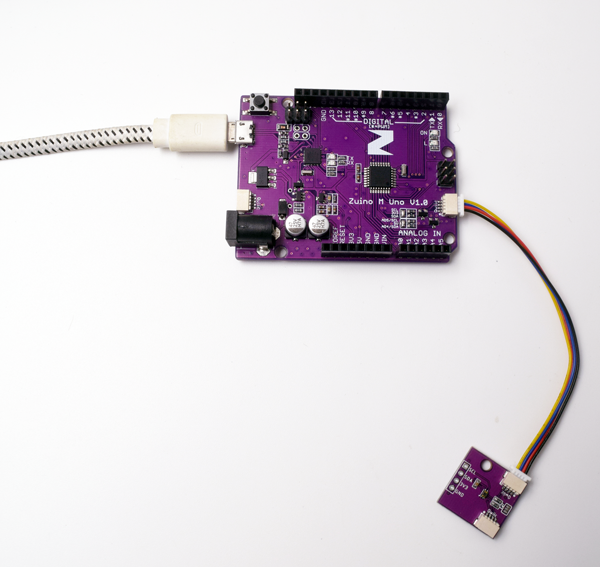
1. Setting Up with Zuino M UNO
For set up using XS PsyFi32 go here. If you want to know how to set up your UV sensor with an OLED display go straight here.
Step 1 Connect Zio development board with UV Sensor
Step 2 Install library
Download and install the Adafruit VEML6075 library you have downloaded to your Arduino IDE.
Don’t know how to install libraries? This complete guide by Arduino explains how to install libraries to your Arduino IDE.
Step 3 Fulltest Demo code
Open your Arduino IDE.
Go to File > Examples > Adafruit VEML6075 Library > veml6075_fulltest
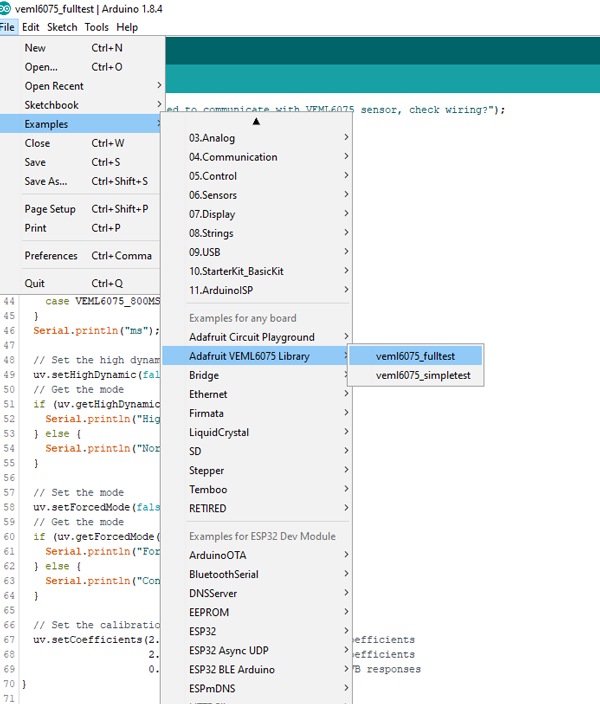
Set your Tools Board to Arduino Uno/Genuino Uno and set your com port.
Upload and run your code to your board.
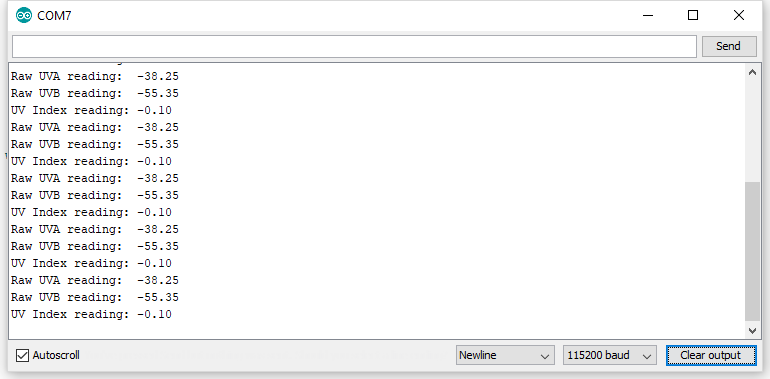
Open your Serial Monitor (make sure it is set at 115200) to check the readings. The fulltest demo will provide UVA, UVB and UV index readings from your UV Sensor.

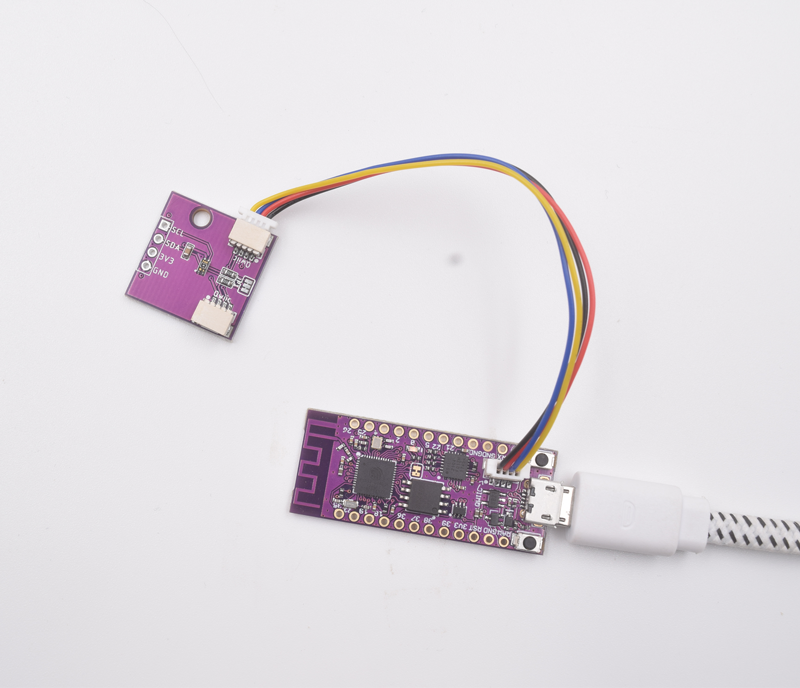
2. Setting Up with Zuino PsyFi32
Step 1 Connect Zio development board with UV Sensor
Step 2 Install library
Download and install the Adafruit VEML6075 Library you have downloaded to your Arduino IDE.
Don’t know how to install libraries? This complete guide by Arduino explains how to install libraries to your Arduino IDE.
Step 3 Fulltest Demo code
Open your Arduino IDE.
Go to File > Examples > Adafruit VEML6075 Library > veml6075_fulltest
Set your Tools Board to Esp32 Dev Module and set your com port.
Upload and run your code to your board.
Open your Serial Monitor (make sure it is set at 115200) to check the readings. The fulltest demo will provide UVA, UVB and UV index readings from your UV Sensor.
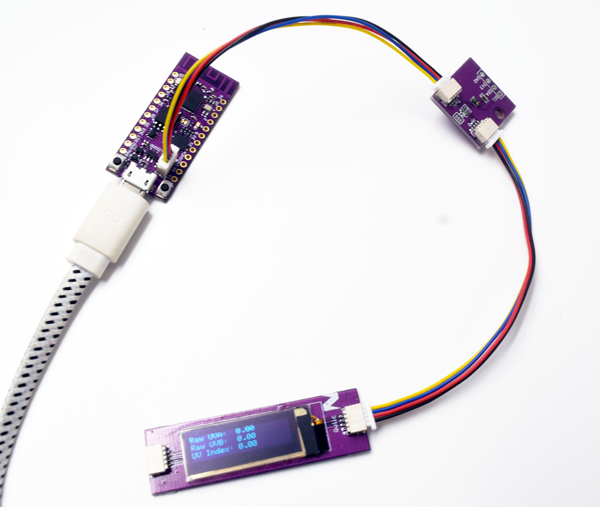
3. Setting up for OLED Display
This tutorial works with our Zuino development boards. Don’t forget to set the right board and com port of your device in the Arduino IDE Tools settings.
We will do a demo test using Zio Qwiic 0.91in OLED Display and display readings for UV test. For this example code, we will use Adafruit’s library. You should have installed the Adafruit libraries below:
Adafruit GFX
Adafruit SSD1306 library
We also have a separate blog post and qwiic start guide for our OLED display. You can check it out here.
Below is the code for testing our UV Sensor with OLED showing basic readings on UVA, UVB and UV Index. You can download the demo code here.
OLED demo with Zuino M Uno Development board

OLED demo with Zuino XS PsyFi32 Development board
We also post a tutorial on how to connect your UV sensor using IoT platform as an IoT device and app. Check out the blogpost here.