


")

")
/zio-qwiic-temperature-humidity-sensor-sht31-44377-300x300.jpg "Zio Qwiic Temperature Humidity Sensor (SHT31)")
")
Zio Temperature and Humidity Sensor Qwiic Start Guide
This post is part of our Zio Qwiic Start Guide Blog Series.
Table of Contents
- Introduction
- Zio Qwiic SHT31 Overview
- Configuring your Temp & Humidity Sensor
- Difficulty Level
- Helpful Resources
- Hardware
- Software
- Setting Up with Uno
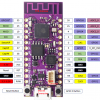
- Setting Up with PsyFi32
- Setting up with OLED Display
Introduction
This SHT31 sensor is very useful for projects that require measurements of temperature and humidity. Commonly found in applications like weather monitoring and Indoor Environment monitoring to detect room comfort levels relative to humidity and temperature. It is also useful in projects that manage health effects and illnesses.
Zio Qwiic SHT31 Temperature & Humidity Overview
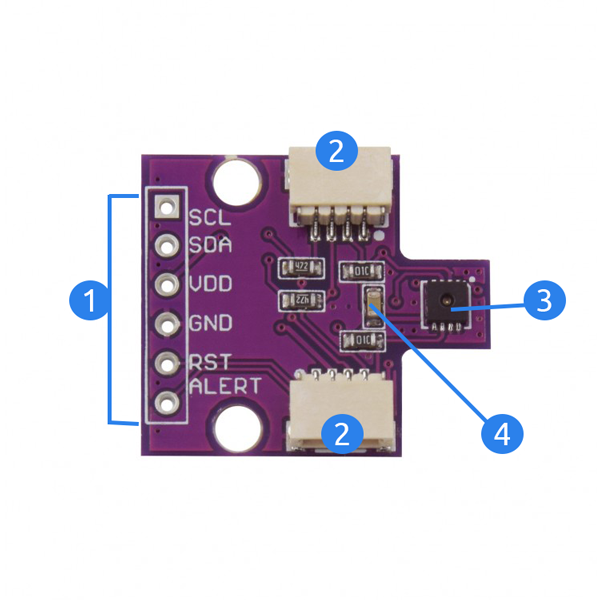
- I2C Power and Logic Pins
Pins | I/O Type | Description |
SCL | Input/Output | Serial Clock Pin |
SDA | Input/Output | Serial Data Pin |
VDD | Supply | Supply Voltage Pin |
GND | Supply | Ground Pin |
RST | Input | Reset pin active low |
ALERT | Output | Indicates alarm condition. Use as Alert or Interrupt pin |
- Qwiic Connectors: System to easily connect to other qwiic compatible modules using Qwiic cables
- SHT31 sensor: Measures the Ambient Temperature in degrees Celcius and the percentage of Relative Humidity
- I2C Selectable Addresses at 0x44 (default) and 0x45
- I2C pull-up resistors
Configuring your Temperature and Humidity Sensor (SHT31)
Difficulty Level:
Helpful Resources:
You should have a basic understanding of how to install Zio development boards. In this tutorial, we assume that your development board is already configured and is ready to be set up with our Temperature & Humidity Sensor. If you haven’t configured your board yet check out our development boards Qwiic Start Guide tutorial below:
Hardware:
Software:
1. Setting Up with Zuino M UNO
*For set up using XS PsyFi32 go here.
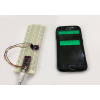
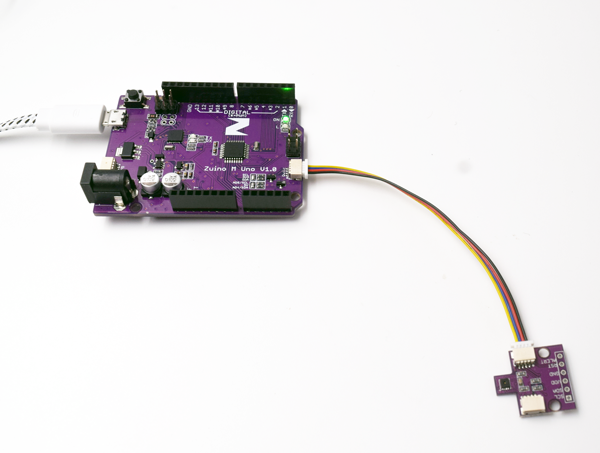
Step 1 Connect Zio development board with SHT31 Temperature & Humidity Sensor
Step 2 Install library
Download and install the Adafruit SHT31 library you have downloaded to your Arduino IDE.
Don’t know how to install libraries? This complete guide by Arduino explains how to install libraries to your Arduino IDE.
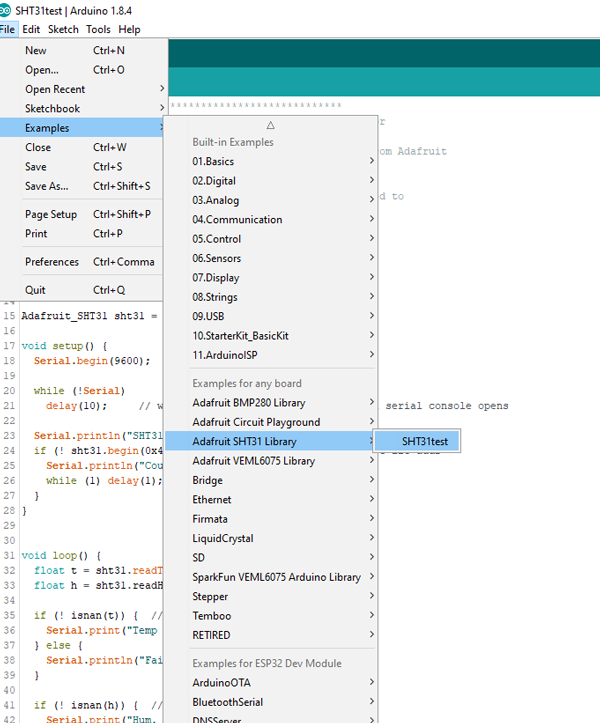
Step 3 Example Demo code
Open your Arduino IDE.
Go to File > Examples > Adafruit SHST31 Library > SHT31test
Set your Tools Board to Arduino Uno/Genuino Uno and set your com port.
Upload and run your code to your board.
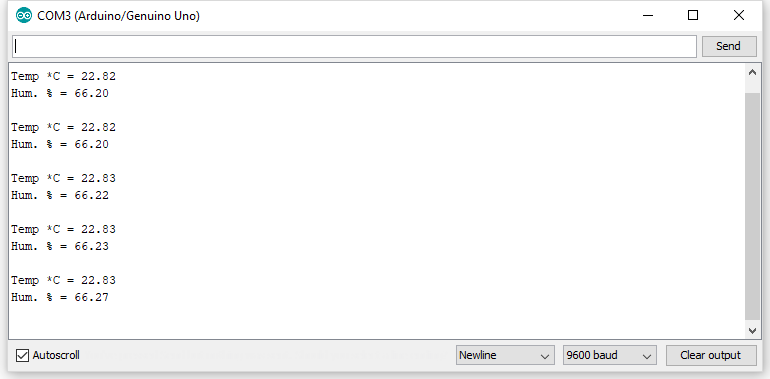
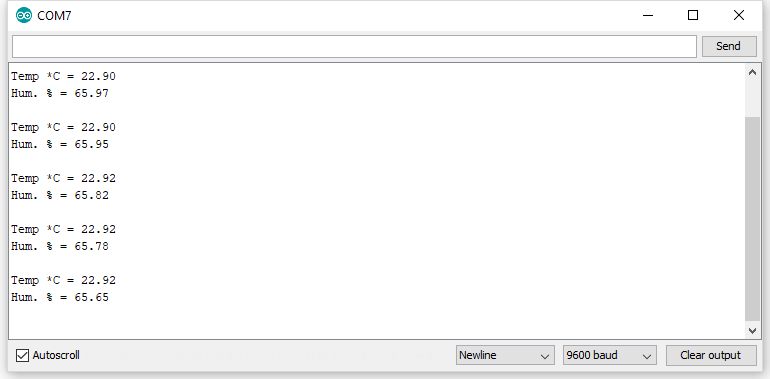
Open your Serial Monitor (make sure it is set at 9600 baud) to check the readings. Your sensor will provide temperature readings (Celcius) and Relative Humidity (%).
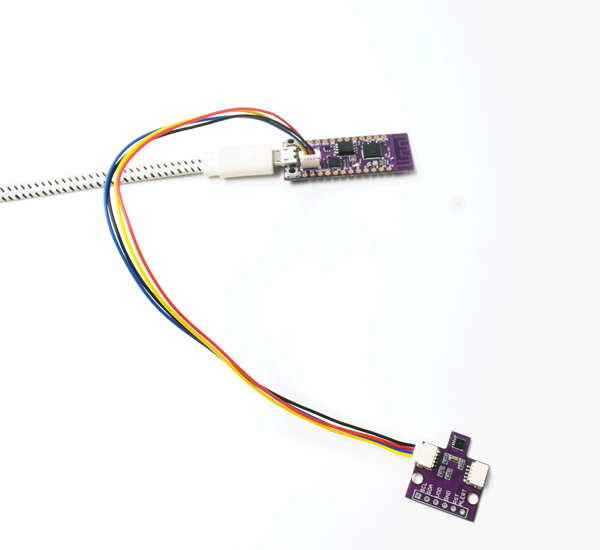
2. Setting Up with Zuino PsyFi32
Step 1 Connect Zio development board with SHT31 Temperature & Humidity Sensor
Step 2 Install library
Download and install the Adafruit SHT31 library you have downloaded to your Arduino IDE.
Don’t know how to install libraries? This complete guide by Arduino explains how to install libraries to your Arduino IDE.
Step 3 Example Demo code
Open your Arduino IDE.
Go to File > Examples > Adafruit SHST31 Library > SHT31test
Set your Tools Board to Esp32 Dev Module and set your com port.
Upload and run your code to your board.
Open your Serial Monitor (make sure it is set at 9600 baud) to check the readings. Your sensor will provide temperature readings (Celcius) and Relative Humidity (%).
3. Setting up for OLED Display
This tutorial works with our Zuino development boards. Don’t forget to set the right board and com port of your device in the Arduino IDE Tools settings.
We will do a demo test using Zio Qwiic 0.91in OLED Display and display readings on SHT31 sensor for Temperature and Relative Humidity readings. For this example code, we will use Adafruit’s library. You should have installed the Adafruit libraries below:
We also have a separate blog post and qwiic start guide for our OLED display. You can check it out here.
Below is the code for testing our Temperature & Humidity Sensor with OLED showing Temperature (Celcius) and Relative Humidity (%) basic readings. You can download the demo code here.
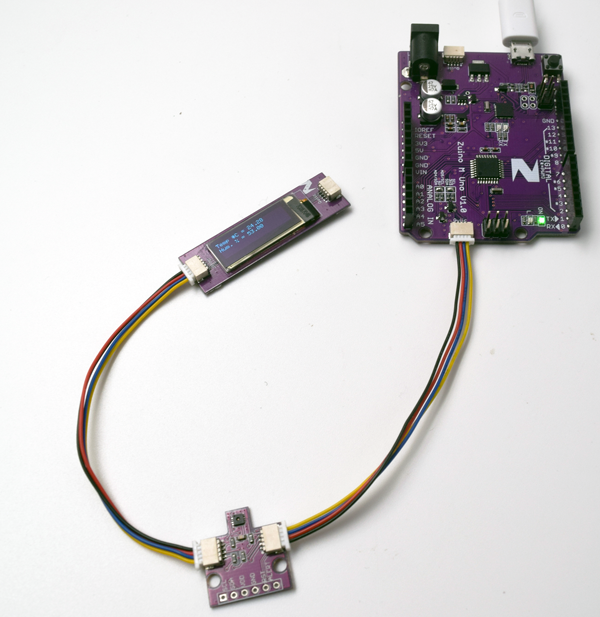
OLED demo with Zuino M Uno Development board
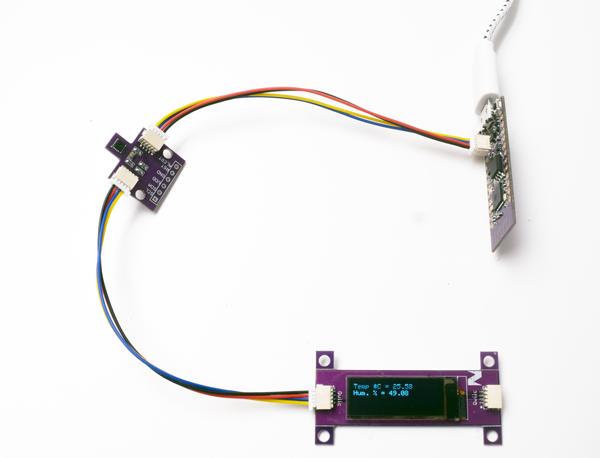
OLED demo with Zuino XS PsyFi32 Development board
Do check out our other Zio qwiic guide blog post here to give you that qwiic inspiration!