


Zuino M UNO Example Codes
Note: This is the example code for our Zuino M UNO Qwiic Start blog.
This post is part of our Zio Qwiic Start Guide Blog Series.
Test Example Code: Blink
Step 1 Select Example code Blink
From your Arduino IDE, go to the ‘File’ tab, select ‘Examples -> 01.Basics -> Blink
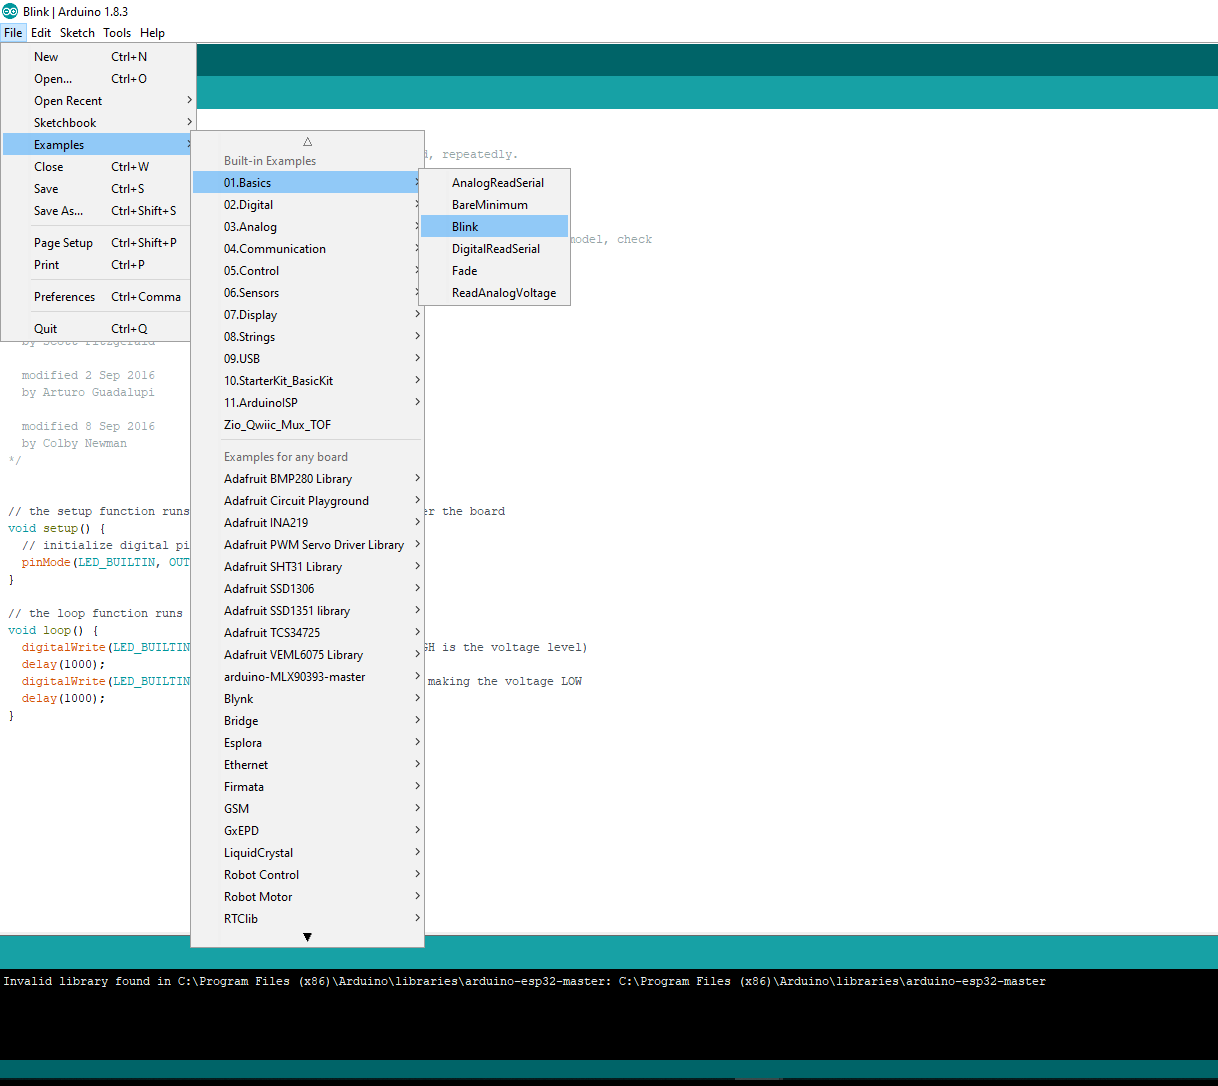
You will be shown with the following code as shown below. Just leave it as is for now.

Step 2 Upload the example code to your board
Click the arrow ![]() button to upload your code to your board.
button to upload your code to your board.
Step 3 Your Zuino board is now blinking!
Step 4 Test by making few changes to the code
Under the setup function you will see the following code:
As explained in the comment section (marked with a forward slash ‘//’), this code pointed to the 13 digital pin, which by default is the pin connected to the LED as explained previously under the board overview. Just leave this code as it is for now as well.
To make changes to the code scroll down to the section under the loop section.
void loop() {
digitalWrite(LED_BUILTIN, HIGH); // turn the LED on (HIGH is the voltage level)
delay(1000); // wait for a second
digitalWrite(LED_BUILTIN, LOW); // turn the LED off by making the voltage LOW
delay(1000); // wait for a second
}
The code under loop function will repeatedly run your code unless you specifically told it to stop. To test your code for BLINK you can make changes to how FAST or how SLOW your LED Blink.
What does the code mean:
HIGH - simply means switching your LED on
LOW - simply means the opposite of HIGH, that is switching your LED off
delay - As the name suggests, this is the time taken for your code to ‘pause’. It is stated in milliseconds (ms) format. For example 1000 = 1 second.
To change how fast or slow your code blinks, you only need to change the time in delay section. Play around with the delay time and see how your Zuino board blinks :).
Aaaaaaaanddd it’s a wrap!
You now have a basic understanding of what your Zuino M UNO can do on its own. Play around with other Arduino IDE Example codes as well to further your understanding on our Zuino board.
Also, if you’re all set to create amazing projects with our Zuino board and create projects with other Zio modules, go and check our other qwiic guide posts to help you qwiic start your journey to tinkering awesomeness!
In the meantime do check out our other awesome and cool Zio projects to give you that qwiic inspiration!