


")
OLED Display with Arduino Uno - A "Hello World" Tutorial
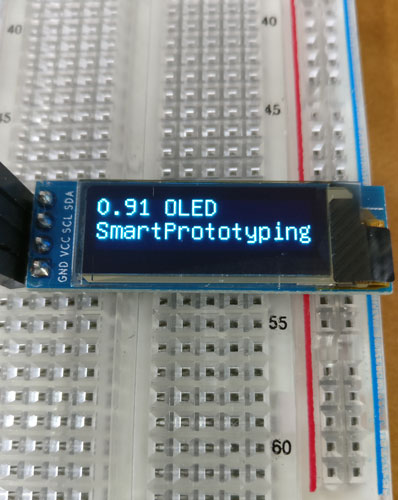
OLED is a thinner, more efficient technology than LCD, meaning high contrasts in thinner, more power efficient builds. The one featured in this tutorial comes pre-assembled so no soldering is required.
What you'll need:
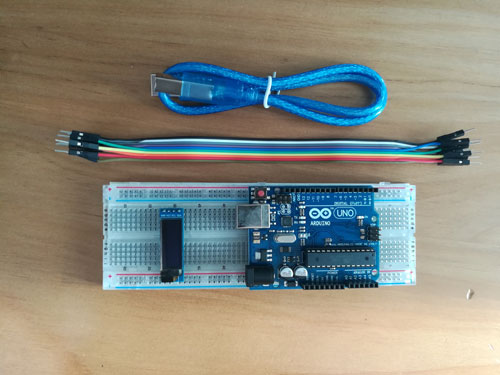
Hardware
- 0.91 inch OLED display 128x32 pixels
- Arduino Uno
- Dupont Wire
- Breadboard
Software
This is a simple and easy set up on the breadboard.
How to connect the pins:
| OLED Display Module | Arduino Uno |
|---|---|
| GND | GND |
| VCC | 3.3V |
| SCL | A5 |
| SDA | A4 |
Copy the OLED display Library to Arduino Library folder located in your Program Files (x86). Don’t forget to restart the IDE afterward.
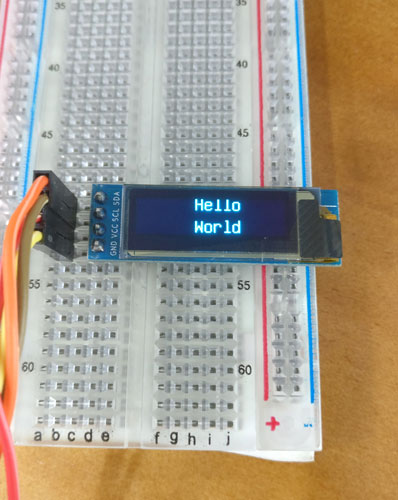
Use the example code provided in this tutorial and upload it to your Arduino Uno.
You can play around with the spacing and positioning of the text on your module by modifying the x and y variables after u8g.setPrintPos. You can also add text to multiple lines by copying and pasting after the original line of text and adjusting the variables:
u8g.setPrintPos(0, 20);
u8g.print("add your text here");
Try to get “Hello World” centered in the middle of the display, what should the variables be changed to?
Thanks for following along!
In the next tutorial, we will show you how to use the library to display images and icons. If you have any suggestions about what to display, leave us a comment!