


E-Ink Display Module Tutorial Part 1 - Text
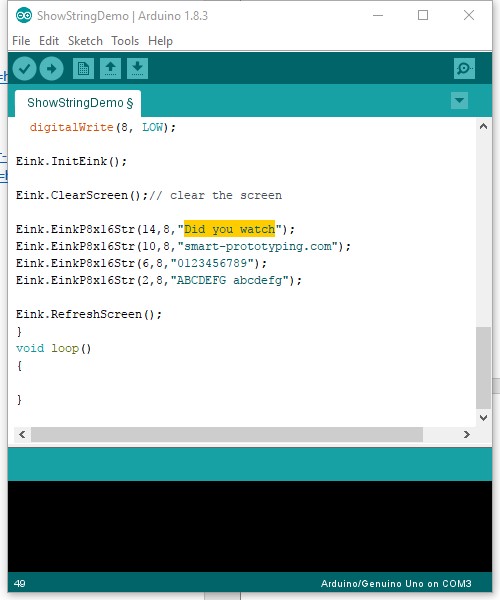
E-Ink Display Module Tutorial Part 1 - Diplay Text with Arduino
This module was designed to be used without adding any additional circuits or components. Even though this tutorial doesn’t use breadboards, feel free to use two of them to connect the Arduino Uno to the E-Ink Display module.
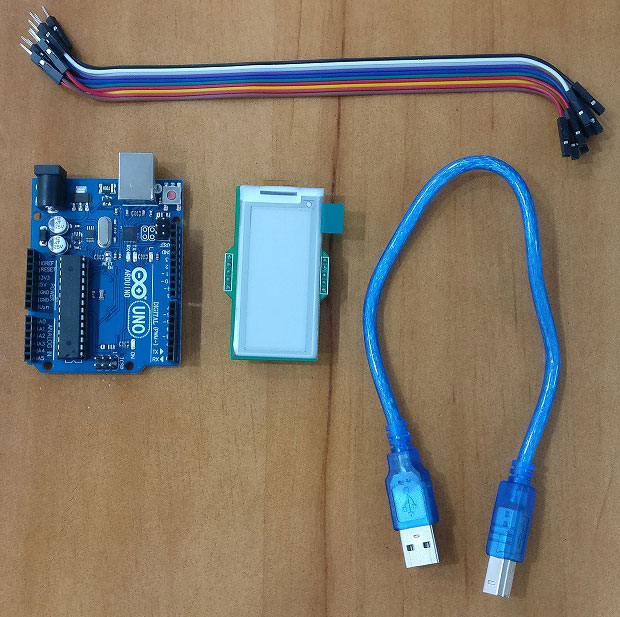
To get started you’ll need:
Hardware:
x1 Arduino Uno
x1 E-Ink Display Module
x1 A-B USB Cable
x1 Dupont (10 wire version) (for breadboard use x1 male-male Dupont)
Software:
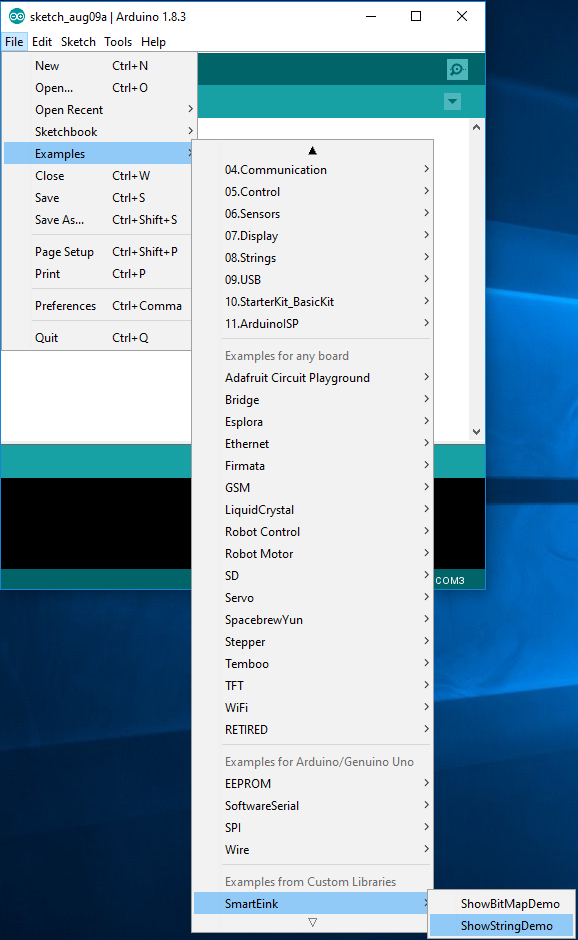
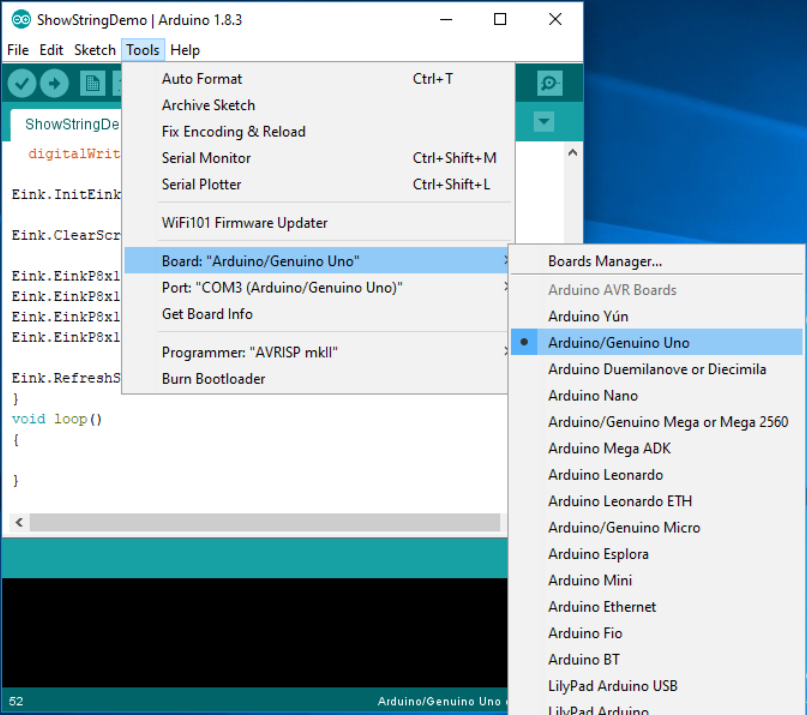
Arduino IDE
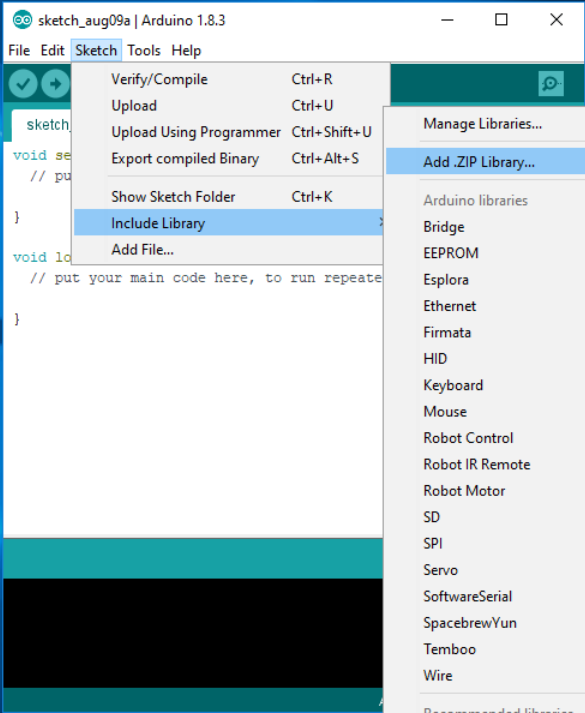
E-Ink Library
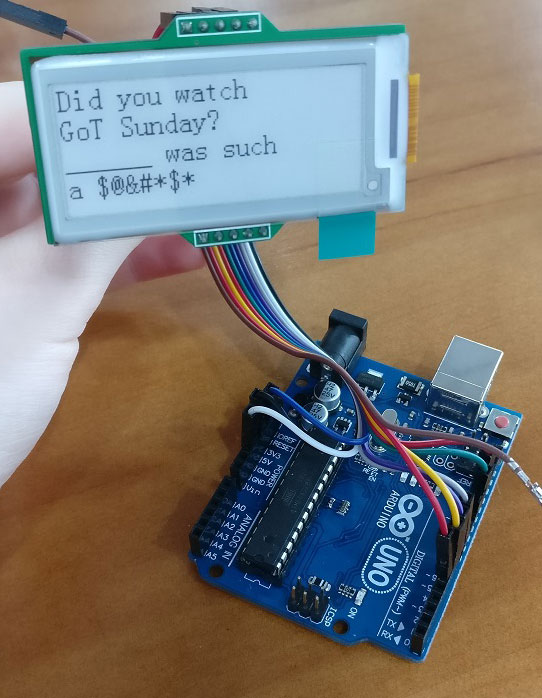
Step 1: Connect the Arduino Uno board and E-Ink Display module
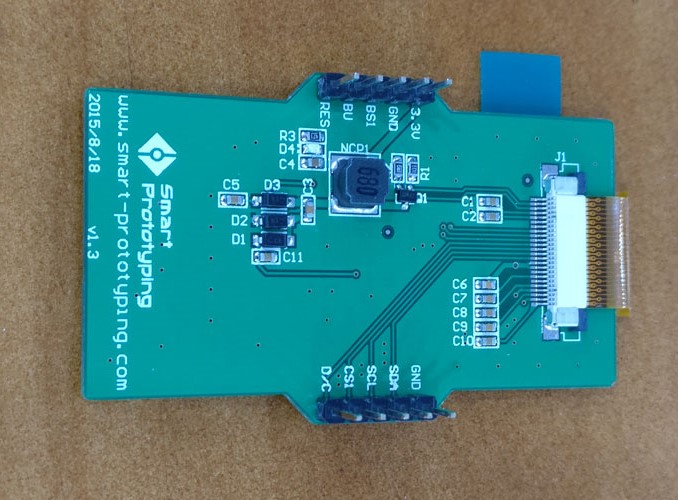
| E-Ink Display | Arduino Uno |
|---|---|
| 3.3V | 3.3V |
| GND (next to 3.3V) | GND (next to 5V) |
| BS1 | D8 |
| BU | D7 |
| RES | RESET |
| SDA | D11 |
| SCL | D13 |
| CS1 | D6 |
| D/C | D5 |
5 Comment(s)

Hi!Any chance to get this working with ESP8266's? Libs doesnt seem to work with these boards.SmartEink_Arduino_Library\SmartEink.cpp: In member function 'void E_ink::WriteComm(unsigned char)': SmartEink_Arduino_Library\SmartEink.h:52:24: error: 'DDRD' was not declared in this scope#define Eink_CS1_HIGH {DDRD |= 0x40;PORTD |= 0x40;}etc

Hi Dante, Yes, it can work with ESP8266. You need to do some changes there. We will release another tutorial for ESP8266 work with E-ink display. Alex
Hi Again!Are you working on that tutorial? :)-Dante

Hi. Thank for your great tutorial. Can i use this library for another e ink display monitor greater size, like 13,3 inch. If it is not, do you have any idea or source code to do this. Thank you so much :).
Hi, Thanks for your comment. Feel free to use the library for your other project. I think the 13.3 inch E-ink display can not use this library directly. As the pins and IC is too much different.

How much power does this use? I am using it on a solar/battery project.Is it possible to make this display go to sleep so it uses ZERO power?
It only uses power when it is flashing, after that, the display itself does not need any(zero) power, you can even uninstall that blue LED to save "more" power :)
Thanks for clarifying :)How much power does it use?Is it the same for this product as well?https://www.smart-prototyping.com/Prototyping-Modules/Display/E-ink-E-paper-new-version-display-module-3.3V-2.04-inch-177x72.html

Hi Dolan,So sorry for my late reply. It uses 5V power. The product link is a similar e-ink which is in the tutorial, but unfortunately, both of the e-ink module is sold out, and will never come back again. We are developing a new model e-ink module, it will come to meet you soon. Thank you! Alex