


")
")
")
Zio OLED 0.91in Display Qwiic Start Guide
This post is part of our Zio Qwiic Start Guide blog Series
Table of Contents
- Introduction
- Zio OLED Display Qwiic Board Specs
- Zio OLED 0.9in Board Overview
- Configuring your OLED Display
- Testing Example Code
Introduction
This Zio OLED Display features a whopping 128x32 pixels in a small 0.91in (diagonal) frame. That’s 4,000 itsy-bitsy LEDs. [pause for effect]
Don’t get put off by the sheer size of this LED screen, at 0.91”, this gem can display up to 3 lines of text! No backlight required for this either as LED has its own light. The breakout board also features 4 mounting holes that can be snapped off and 2 Qwiic connectors to allow for quick and easy daisy-chaining.
In this Qwiic Start guide, you will learn what’s awesome about our Zio OLED Display board, the components needed to Qwiic Start your projects, and how easy it is to configure and set it up with our Zuino development boards!
Zio OLED Display Qwiic Board Specs:
Communication Protocols: I2C
OLED display
0.9 in diagonal
128 x 32 pixels
Dimensions with Mounting Tab: 25.1x 50.3mm
Dimension without Mounting Tab: 50.3x15.1mm
Weight: 5g
Zio OLED 0.9in Qwiic Board Overview
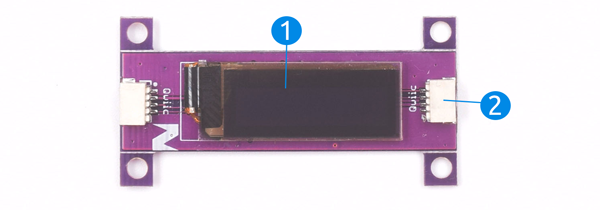
OLED Display
Organic light-emitting diode (OLED) display, used in mobile devices today because they are thin, efficient, flexible and bright. Ours also has similar capabilities, if not, more awesome, in its own special way. Our little gem can display up to 3 lines of text (don’t underestimate it’s minute size) for a 0.9in at 128x32 pixels!
Qwiic Connector
Our Zio OLED display is incorporated with the Qwiic Connector System. Qwiic is an ecosystem of I2C sensors, actuators, shields, and cables that make prototyping faster and less prone to error.
We have a separate page dedicated to explaining what Qwiic connector is. You can learn more about it here.
Configuring your OLED Display with Zuino M UNO
Helpful Resources:
Before attempting this qwiic guide you should already read our Zuino M UNO Qwiic Start guide to easily configure your OLED display with Zuino board.
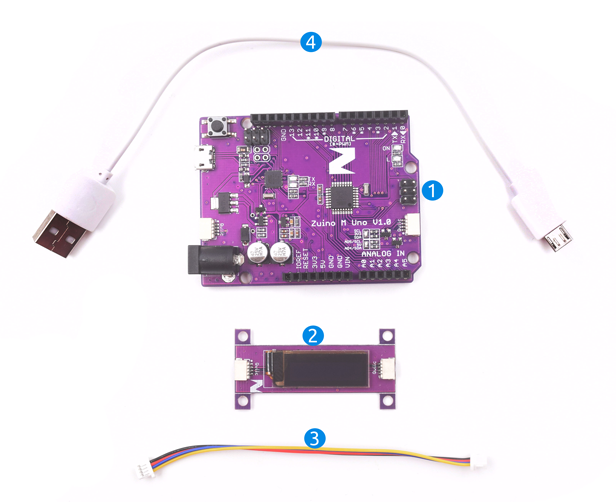
For this section, you should already have the following:
Congratulations! You’re now a proud owner of an awesome 0.9in OLED Display by Zio. We will show you how easy it is to configure this little gem and ‘Qwiic Start’ your awesome project!
Installing Libraries
You need to install the following libraries to your Arduino IDE before you can start programming your Zuino board with Zio Qwiic OLED display.
Download the following libraries and save it on your local folder:
To install the libraries open your Arduino IDE, go to Sketch tab, select Include Library -> Add .Zip Library. Select the above libraries to be included on your IDE.

It is very easy to configure your board with Zio OLED display. Follow the following steps to get started:
Step 1 Connect your OLED display to your Zuino board with Qwiic cable
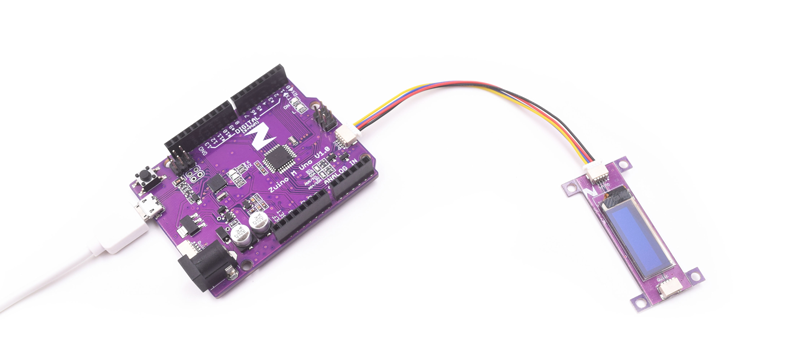
Step 2 Open Arduino IDE (You should have the right board and COM selected)
And that’s it, really! Easy isn’t it? Next step is the coding part~
Testing Example Code
Step 3 Test your OLED display with Zuino M UNO
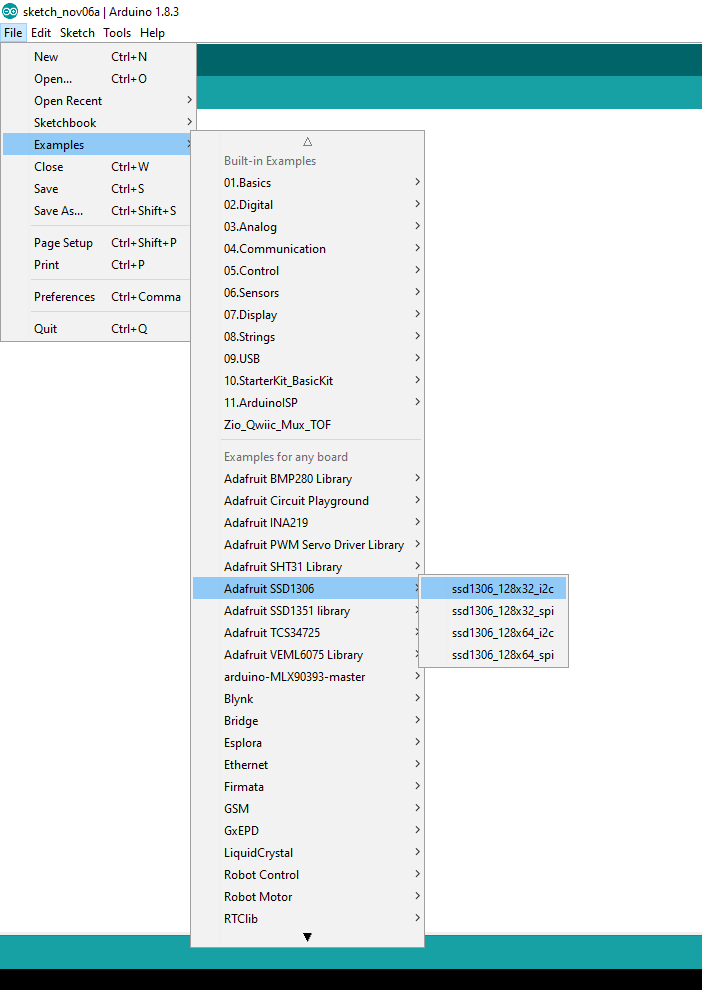
You will learn how to test example codes to show what your OLED display can do. To start off with some example codes, go to File on your IDE, select Examples -> Adafruit SSD1306 -> ssd1306_128x32_i2c
Step 4 Run your code by clicking ![]()
If you have configured your OLED and Zuino correctly you will have your OLED display the example codes. You might not understand the codes right now but to put it in simple terms, the code above will show all the things it can do on this cute little OLED screen.
A rundown the code can display and print:
Text
Bitmaps
Circles
Rectangles
Pixels
lines
There you have it! You have configured your OLED, and have a basic understanding of what Zio OLED can do. Bravo, Younglings!
Are you ready to create your awesome project with Zio OLED? Do check out our other qwiic guide posts to help you qwiic start your journey to tinkering awesomeness!
Do let us know what cool projects you have created with our Zio products! We love to hear from you! In the meantime check out our other awesome and cool Zio projects to give you that qwiic inspiration!