


")


A DIY Clock with All I2C Compatible Components
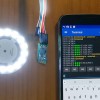
You might know how to build a DIY clock with a RTC module and a 4-digit 7-segment display, but now let’s be serious. Because this time, we are go to use this amazing I2C compatible 1.2inch 4-digit 7-segment display. Perfect display size for a clock!

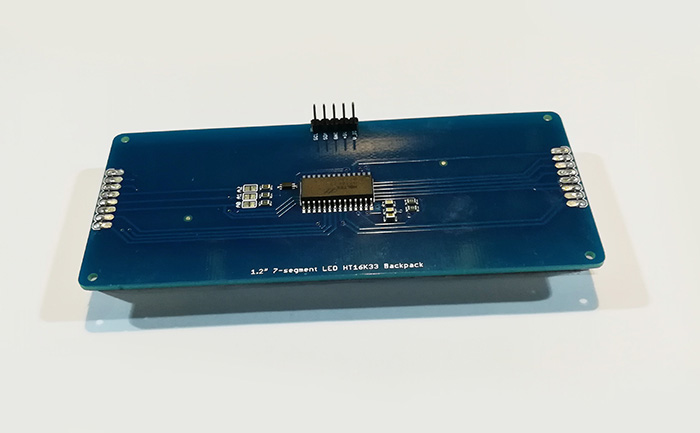
A 4-digit 7-Segment display is very suitable for this clock project, but controlling it is not going to be so easy. There are 12 pins for a normal one, so you will need to spend some time programming it. When I was a beginner, I always got lost on the pins and the countless ways to display a number on the clock!
With the all I2C friendly module and our Zunio M Uno, you can build the clock very fast!
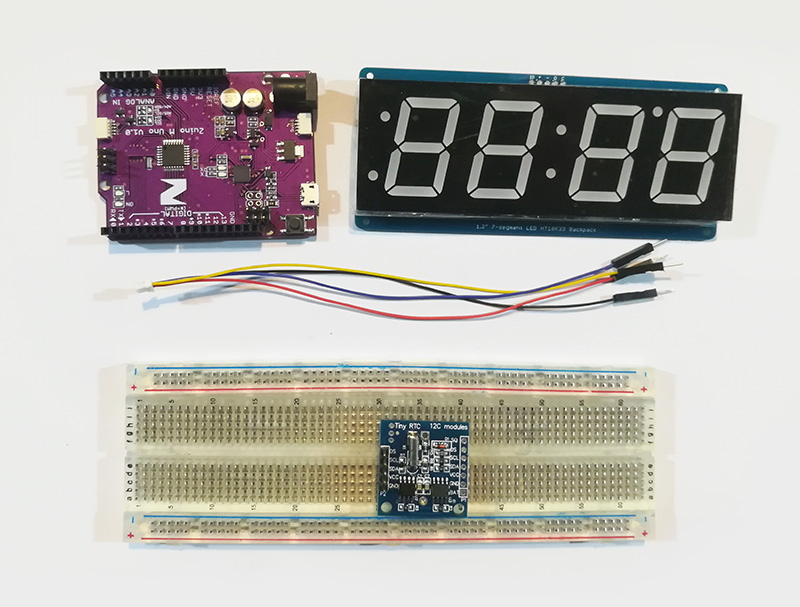
Hardware:
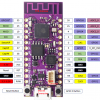
- Zuino Uno M
- RTC module (I2C)
- 1.2inch 4-digit 7-Segment Display (i2C)
- Qwiic Cable
- Breadboard
- USB Cable
Software
- Arduin IDE
- Adafruit Library
- Example Code
Connections:
Follow the connections in this list, you will find this is a max. 5 minutes work to finish it.
| Zuino M UNO | 1.2inch 4-digit 7-segment display (I2C) | |
| Qwiic Cable | Black | - (GND) |
| Blue | O (SDA) | |
| Yellow | C (SCL) | |
| 5V | + (VCC) | |
| Zuino M UNO | RTC Module (I2C) | |
| Qwiic Cable | Black | GND |
| Blue | SDA | |
| Yellow | SCL | |
| 5V | VCC | |
| NC | DS | |
The connections are very easy if you have some basic knowledge about I2C. The Qwiic connector’s VCC is 3.3V, so for any 5V VCC pins, connect it to Arduino’s 5V pin.
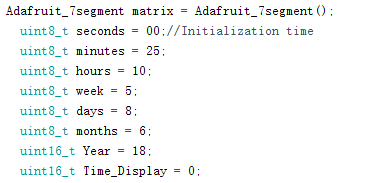
Now download the example code we provide in the link, and you will need to adjust the time to make sure it will display the real time,
Then let’s upload the code to Arduino.
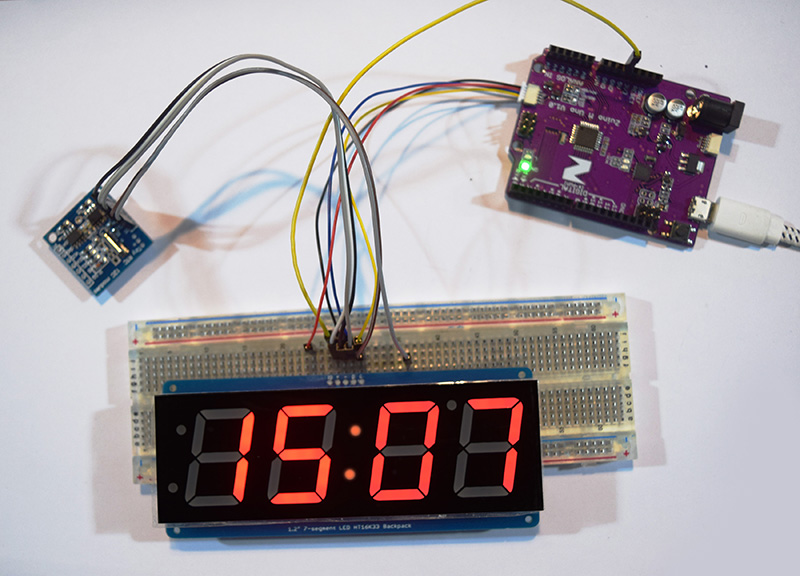
Now you can enjoy the DIY clock you just made!