


")
")
How to Start with SK6812 5050 RGB LEDs
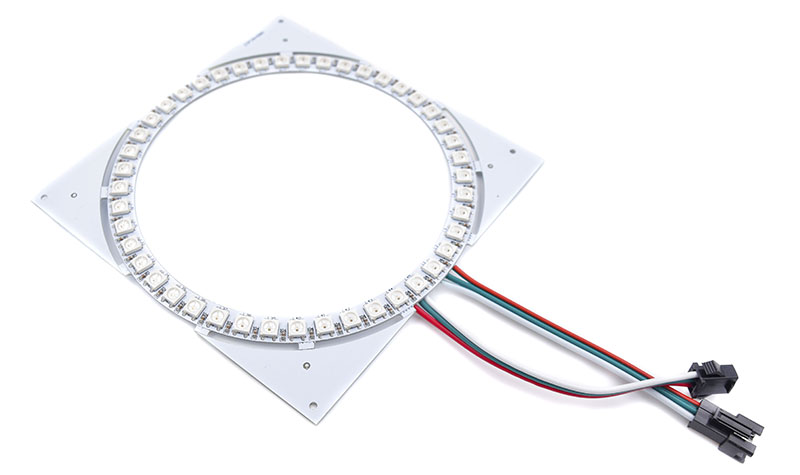
This larger LED ring has 45 addressable SK6812 RGB LEDs on board with two sets of 3-wire input and output cables and connectors. Daisy chain away with more LED rings.
These SK6812-based LED strips work as a drop-in replacement for the older WS2812B-based strips in most applications, and they can chain together with the WS2812B-based LED strips. The main difference is that SK6812 has voltage-independent colour and brightness over a wide voltage range. This means that the colors of the LEDs should not be affected by a sudden drop in the supply voltage as much as they are seen on the WS2812B.
Read here to know more about SK6812 LEDs as compared to WS2812B LEDs: https://cpldcpu.wordpress.com/2016/03/09/the-sk6812-another-intelligent-rgb-led/
This RGB LEDs can be controlled individually by just using one signal pin, it’s awesome! As with the typical RGB LED strip, you can control the color of whole strip but not the individual LEDs.
Here’s the tutorial for controlling the typical RGB LED strips using 3 MOSFET (each MOSFET for Red, Green and Blue colors):
In this article, I want to show you how I use the SK6812 RGB LEDs ring to make a simple project – the LED color will change according to the distance sensed from the HC-SR04 ultrasonic sensor.
Hardware:
- SMDuino (Arduino Compatible board)
- HC-SR04 Ultrasonic Sensor
- SK6812 5050 45 RGB LEDs Ring
- Male to male jumper cables
Software
- Arduino IDE
- Adafruit Neopixel Library
- Demo Code
Step 1: Hardware Connection
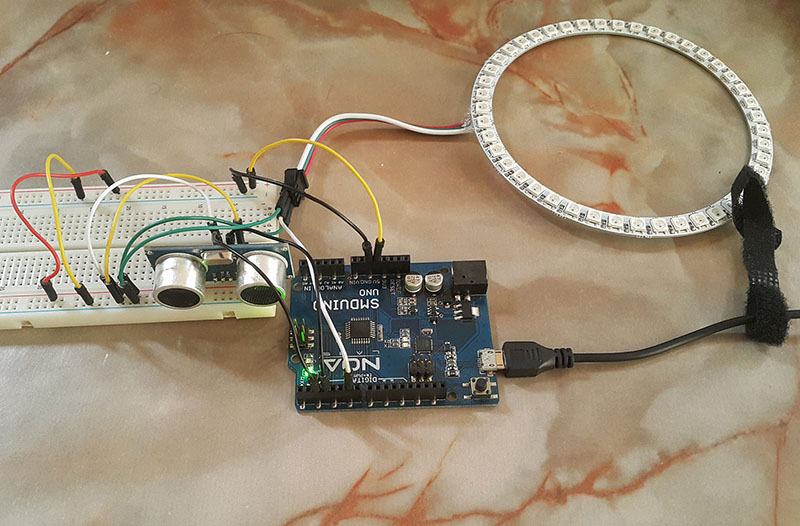
For HC-SR04 Ultrasonic Sensor
| HC-SR04 | Arduino |
| VCC | 5.0V |
| Trig | 2 |
| Echo | 3 |
| GND | GND |
For SK6812 RGB Ring
| SK6812 RGB Ring | Arduino |
|---|---|
| 5V | 5V |
| - | GND |
| DIN | D6 |
Step 2: Arduino Code
This is the Arduino code that will read the distance from HC-SR04 Ultrasonic sensor and then output different colour to the SK6812 RGB Ring.
There’s a simple tutorial available from Adafruit regarding the usage of the Neopixel: https://learn.adafruit.com/adafruit-neopixel-uberguide/arduino-library-use
Step 3: Expected Result
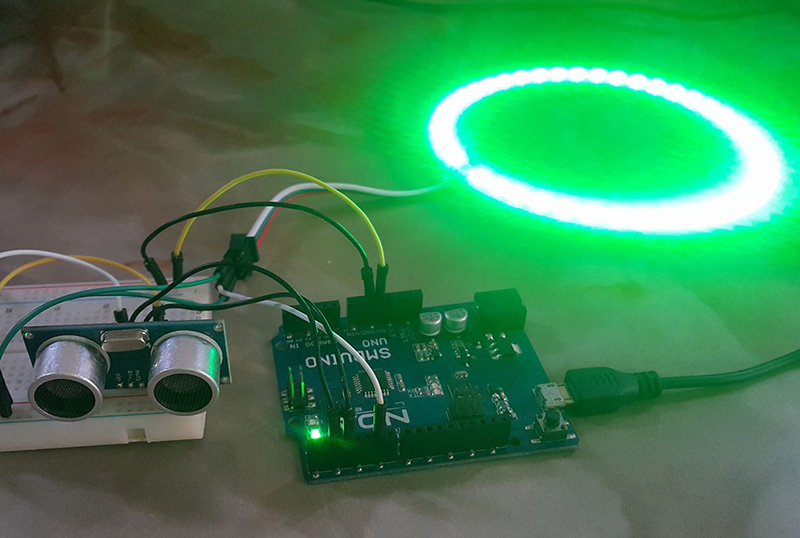
When there is no obstacle in front of the ultrasonic sensor, the SK6812 ring will not light up. When the obstacle in front of the ultrasonic sensor is less than 50cm and greater than 30cm, the ring shine green. When the distance sensed is less than 30cm and greater than 10cm, it will change to yellow. Lastly, when the distance sensed is less than 10 CM, the ring would eventually turn to red colour. Congratulations! You have just successfully been able to control the SK6812 RGB Ring via a simple Arduino project!