


")
")

")
")
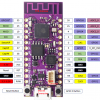
/zio-qwiic-air-pressure-sensor-bmp280-44378-300x300.jpg "Zio Qwiic Air Pressure Sensor (BMP280)")
Zio Air Pressure Sensor Qwiic Start Guide
This post is part of our Zio Qwiic Start Guide Blog Series.
Table of Contents
- Introduction
- BMP280 Air Pressure Sensor Overview
- Configuring your BMP280
- Difficulty Level
- Helpful Resources
- Hardware
- Software
- Setting up with Zuino M Uno
- Setting up with PsyFi32
- Setting up for OLED
Introduction
This compact and absolute Barometric pressure sensor is specially designed for mobile applications to measure the Air pressure content in Pascal (Pa), temperature sensitivity in Celsius and the Altitude levels in metres (m).
You will always see this sensor to be widely used by most beginner Makers and DIY for their weather forecast projects. Check out our step by step blog on building your very own simple IoT Weather Monitoring Station!
But this sensor is not just for you to build your very own weather station, it is also used in various non-weather applications like GPS enhancement example for slope detection, indoor detection of floor levels (elevation levels), used in sports, and in healthcare applications, for example, spirometry - tool to diagnose asthma, chronic obstructive pulmonary disease (COPD) and other conditions that affects breathing.
This post will guide you on how to configure our Zio Air pressure Sensor (BMP280) and demo its functionality by testing example codes. By the end of this tutorial, you will have a basic understanding of the capabilities of this robust sensor and will give an idea to tinker your next amazing project!
Zio Qwiic BMP280 Air Pressure Sensor Overview
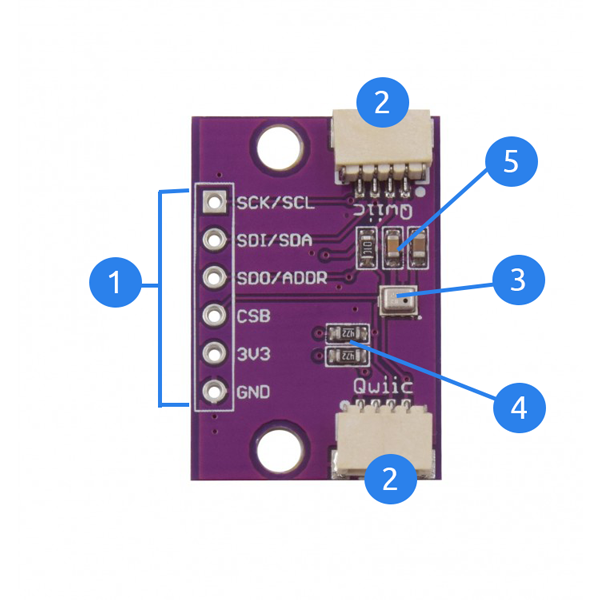
I2C Power and Logic Pins
Name | I/O Type | Description | SPI 4W | I2C |
GND | Supply | Ground Pin | GND | GND |
3V3 | Supply | Digital Interface Supply | VDD | VDD |
CSB | In | Chip Select Pin | CSB | VDD |
SDI | In/Out | Serial Data Input pin | SDI | SDA |
SDO | In/Out | Serial Data Output pin | SDO | GND for default address |
SCK/SCL | In | Serial Clock Input pin | SCK | SCL |
- Qwiic Connectors - System to easily connect to other qwiic compatible modules using Qwiic cable
- BMP280 Sensor - measures Temperature, Barometric Air pressure and Altitude
- I2C pull-up resistors
- Selectable I2C Addresses at 0x77(default) and 0x76
Configuring your BMP280 Air Pressure Sensor
This qwiic start guide works for all our Zio development boards.
Difficulty Level:
Helpful Resources:
You should have a basic understanding of how to install Zio Qwiic development boards. In this tutorial, we assume that your development board is already configured and is ready to be set up with our sensor. If you haven’t configured your board yet check out our development boards Qwiic Start Guide tutorial below:
Zio Zuino PsyFi32 Qwiic Start Guide
Zio Zuino M UNO Qwiic Start Guide
Hardware Set up:
Zio Qwiic Air Pressure (BMP280) Sensor
Software:
Arduino IDE
Adafruit BMP280 Library
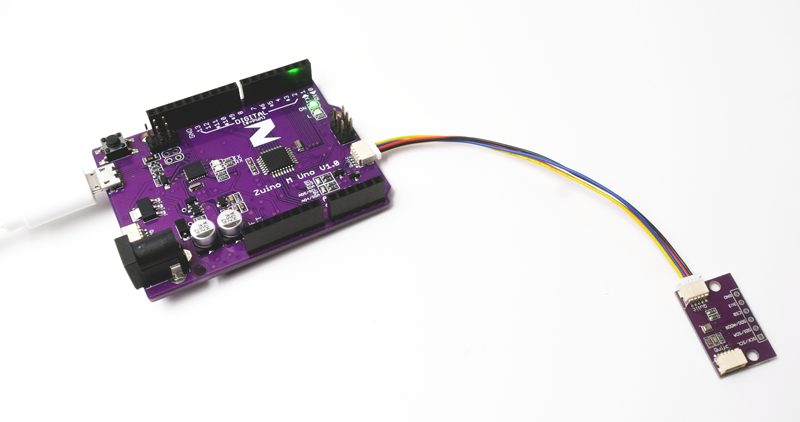
1. Setting Up with Zuino M UNO
*For set up using XS PsyFi32 go here.
Step 1 Connect Zio development board with Air Pressure Sensor
Step 2 Install library
Download and install the Adafruit BMP280 library you have downloaded to your Arduino IDE.
Don’t know how to install libraries? This complete guide by Arduino explains how to install libraries to your Arduino IDE.
Step 3 Example Demo code
Open your Arduino IDE.
Go to File > Examples > Adafruit BMP280 Library > bmp280test

Set your Tools Board to Arduino Uno/Genuino Uno and set your com port.
Upload and run your code to your board.
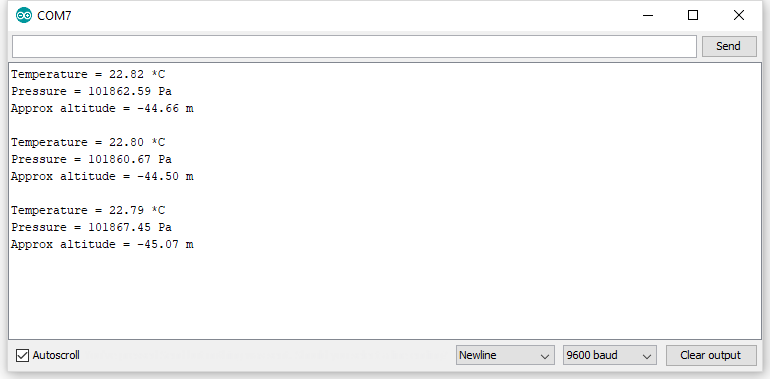
Open your Serial Monitor (make sure it is set at 9600) to check the readings. Your sensor will provide temperature readings (Celcius), Barometric Pressure (Pa), and Approximate Altitude levels (m).

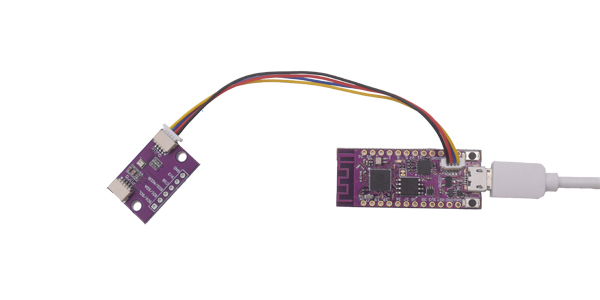
2. Setting Up with Zuino PsyFi32
Step 1 Connect Zio development board with Air pressure Sensor
Step 2 Install library
Download and install the Adafruit BMP280 library you have downloaded to your Arduino IDE.
Don’t know how to install libraries? This complete guide by Arduino explains how to install libraries to your Arduino IDE.
Step 3 Example Demo code
Open your Arduino IDE.
Go to File > Examples > Adafruit BMP280 Library > bmp280test
Set your Tools Board to Esp32 Dev Module and set your com port.
Upload and run your code to your board.
Open your Serial Monitor (make sure it is set at 9600) to check the readings. Your sensor will provide temperature readings (Fahrenheit/Celcius), Barometric Pressure (Pa), and Approximate Altitude levels (m).
3. Setting up for OLED Display
This tutorial works with our Zuino development boards. Don’t forget to set the right board and com port of your device in the Arduino IDE Tools settings.
We will do a demo test using Zio Qwiic 0.91in OLED Display and display readings on BMP280 sensor for Temperature, Pressure and Altitude. For this example code, we will use Adafruit’s library. You should have installed the Adafruit libraries below:
Adafruit GFX
Adafruit SSD1306 library
We also have a separate blog post and qwiic start guide for our OLED display. You can check it out here.
Below is the code for testing our UV Sensor with OLED showing basic readings on Temperature (Celcius), Pressure (Pa) and Altitude(m). You can download the demo code here on our github repo.
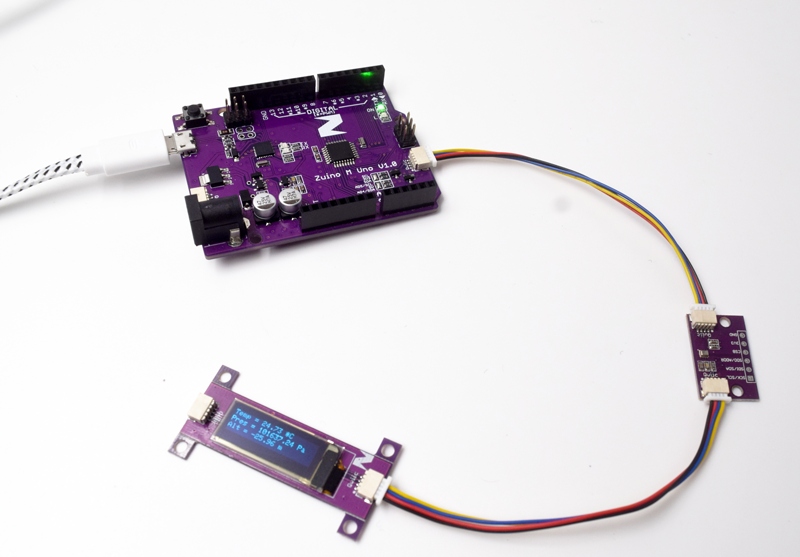
OLED demo with Zuino M Uno Development board
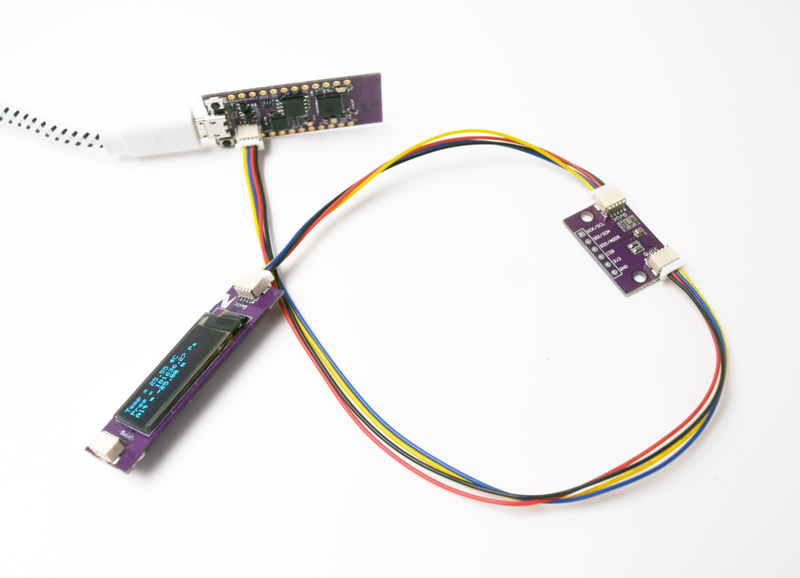
OLED demo with Zuino XS PsyFi32 Development board
We also post a tutorial on how to connect your BMP280 sensor using IoT platform as an IoT weather monitoring station. Check out the blogpost here!