This post is part of our Zio Qwiic Start Guide Blog Series.
Table of Contents
- Introduction
- 1.5" OLED Overview
- Configuring your OLED
- Difficulty Level
- Helpful Resources
- Installing Libraries
- Connection Setup
- Testing Example code
This OLED supports screen size of 128 x 128 pixels and can display up to 16 lines of code at 1.5-inch diagonal display. Compared to a 0.91-inch OLED we have in store, this OLED can output bigger screens and much better graphics and animation and it supports virtual fonts and icons too!
Fit for use in small embedded systems, and also suitable for any projects that require displays of any kind, this screen is a must-have for Makers to include in even as one of their wearable DIY projects.
This beginner-friendly tutorial will demonstrate the basic capabilities of this amazing Zio Qwiic 1.5 inch OLED display and how you can easily add it into one of your tinkering projects :)
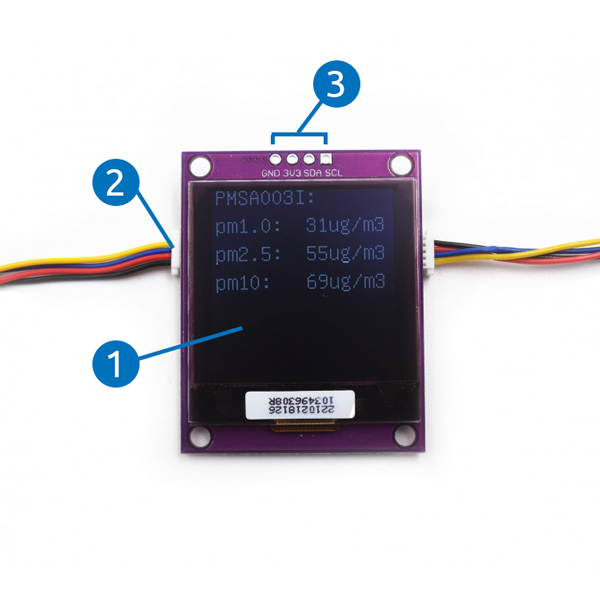
- OLED display : 1.5” @ 128 x 128 pixels
- Qwiic Connectors
- Power and Logic Pins
Difficulty Level:
Helpful Resources:
This qwiic guide has a separate post on our development board guides. Check them out below:
Installing Libraries
You need to install the following libraries to your Arduino IDE before you can start programming your Zuino board with Zio Qwiic 1.5" OLED Display
Download the following libraries and save it on your local Arduino IDE libraries folder:
To install the libraries open your Arduino IDE, go to Sketch tab, select Include Library -> Add .Zip Library. Select the above library to be included on your IDE.
Connection Set up
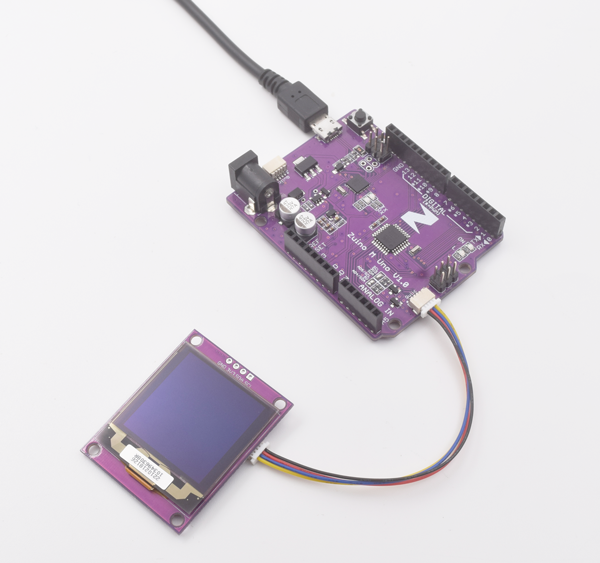
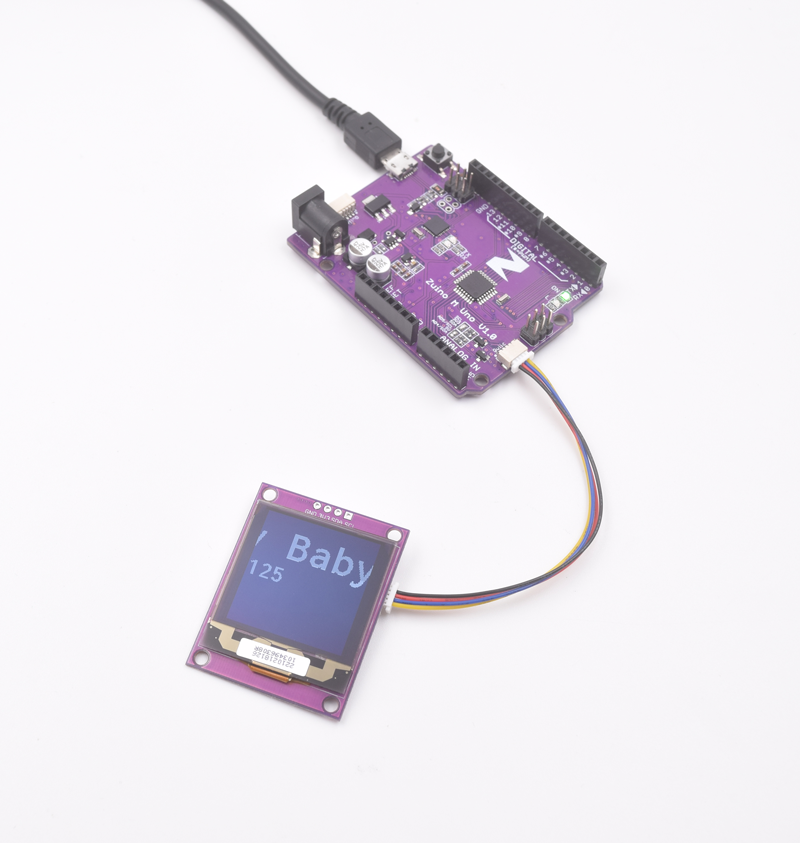
Connection with Zuino M Uno
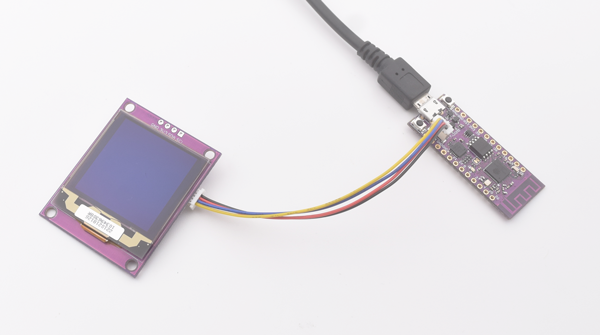
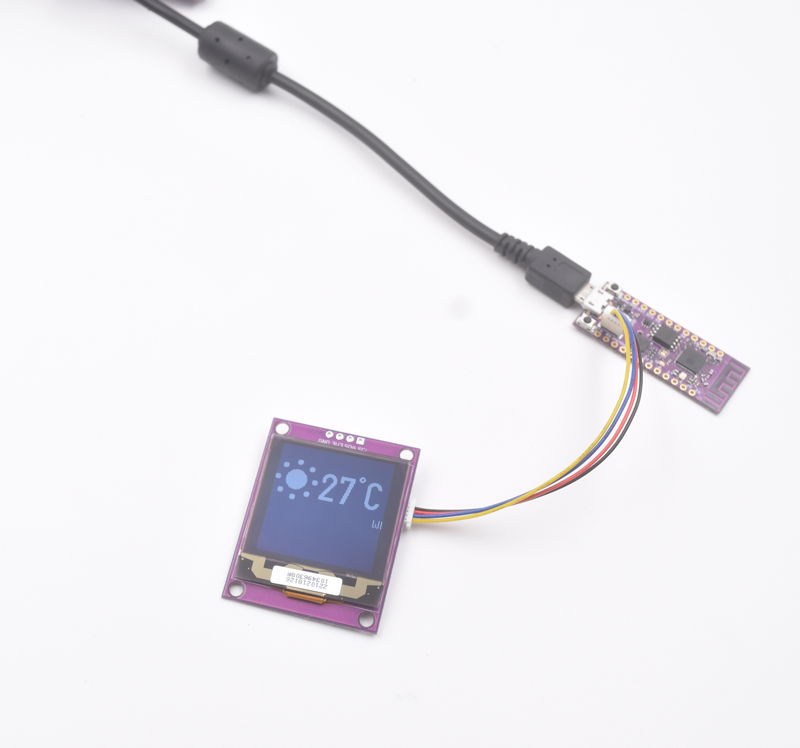
Connection with Zuino XS PsyFi32
We are going to do the following example codes to demo our 1.5” OLED Display. The following examples work with both our Zuino M Uno and Zuino XS PsyFi32 development boards. Just select the right board and port from the Arduino IDE platform.
Scrolling Test
Open your Arduino IDE.
Go to File > Examples > U8g2 > Page Buffer > Scrolling Text
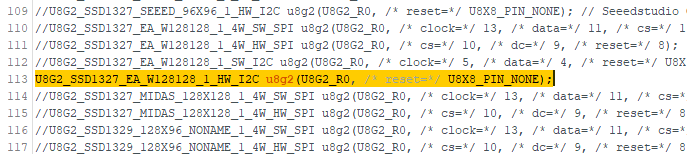
Scroll to Line 113 and uncomment this section:
//U8G2_SSD1327_EA_W128128_1_HW_I2C u8g2(U8G2_R0, /* reset=*/ U8X8_PIN_NONE);
If your IDE does not show lines do the following :
Go to File > Preferences. Under the Settings tab check the box for “Display line numbers”.
Run the code. Make sure you configured your IDE tools with the right board and port. After your IDE finished uploading the code your display will show “U8g2” which scroll pretty slow at 1 pixel from right to left.
Changing the display text
In this example code, the text is defined as a constant character. You can change the value of the constant variable at line 243.
243 const char *text = "U8g2 "; // scroll this text from right to left
You can make changes to the font by changing the code inside the setup() function (line 264) and inside the loop() function (line 279).
264 u8g2.setFont(u8g2_font_inb30_mr); // set the target font to calculate the pixel width
279 u8g2.setFont(u8g2_font_inb30_mr); // set the target font
Changing the speed of the scrolling
Text scrolling in this example is offset by per pixel, with the slowest being at 1 pixel and fastest at 128 pixels which is the maximum size of the OLED display.
On line 291, inside the loop section, change the offset variable to any number depending on how fast or slow you want your text to scroll.
291 offset-=1; // scroll by one pixel
Below is the image of the scrolling text displaying the text “Baby” and scrolling from right to left by 8 pixels using a Zuino M Uno development board.
Below is an image of a display for XS PsyFi32 and 1.5” OLED Display using the Icon Demo example.
Reference:
The above example code is for a "Page Buffer" test. Should you want to code in full buffer, the syntax is as follows:
| |
| | u8g2.begin(); // will start the U8g2 library |
| | u8g2.clearBuffer(); // clear the internal memory |
| | u8g2.setFont(u8g2_font_helvR10_tr); // choose a suitable font u8g2.drawStr(0,10,"Hello World!"); // write something to the internal memory u8g2.sendBuffer(); // transfer internal memory to the display |
You can check out this link for the u8g2 Reference manual. For the list of fonts you can use with U8g2 Arduino library check them out at this link.


")
")
")
")