


")

")

Zio Air Quality Sensor Qwiic Start Guide
This post is part of our Zio Qwiic Start Guide Blog Series.
Table of Contents
- Difficulty Level
- Air Quality Sensor CCS811 Overview
- Configuring your Air Quality Sensor
- Helpful Resources
- Hardware Setup
- Installing Libraries
- Testing Example code
For projects that involve monitoring indoor air quality, this compact and reliable sensor can detect equivalent CO2 (eCO2) measured in parts per million (ppm), and equivalent Total Volatile Organic Compound (eTVOC) measured in parts per billion (ppb) and with some libraries, it can also provide temperature values.
Difficulty Level:
Zio Qwiic Air Quality Sensor Board Overview

- I2C Power Pins
- GND - Ground pin for both I2C power and logic
- 3V3 - voltage pin for 3.3V
- I2C Logic Pins
- SDA - Data signal line
- SCL - Clock signal line
- Control Signals Pins
- WAKE - Wake pin
- INT - Interrupt pin
- RST - Reset pin
- NTC Pins
- Negative Thermal Coefficient (NTC) pins
- Power LED
- Provides an indication that your sensor is working, this LED will light up.
- I2C Pullup Resistors
- I2C Selectable Addresses
- This sensor default address is 0X5A. However, the sensor can be assigned to have a different address (0x5B)
- Main IC
- The Zio Qwiic Air Quality features a CCS811 sensor from AMS, it’s a very small size gas sensor and it can detect a wide range of Volatile Organic Compounds (VOCs) for indoor air quality monitoring.
- Qwiic Connectors
- Like other Zio Qwiic boards, it incorporates the Qwiic connector for it’s convenient and practical setup.
Configuring your Air Quality Sensor
Helpful Resources:
This qwiic guide has a separate post on our development board guides. Check them out below:
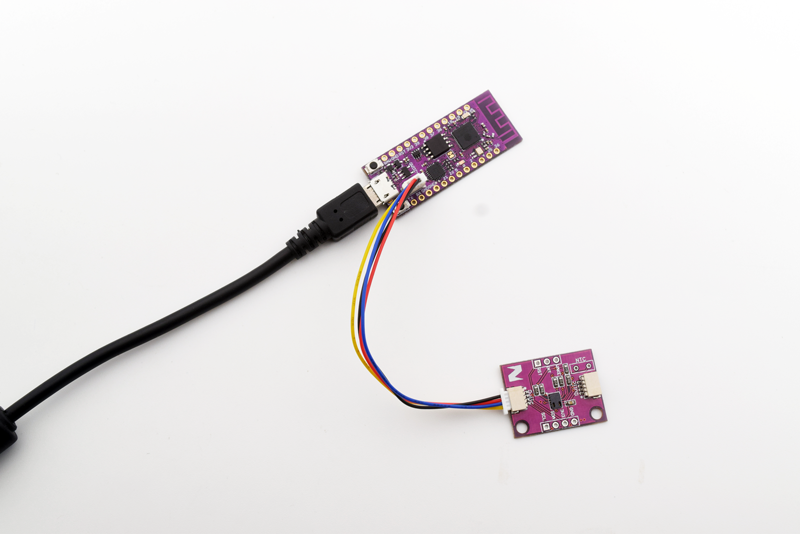
Hardware Set up
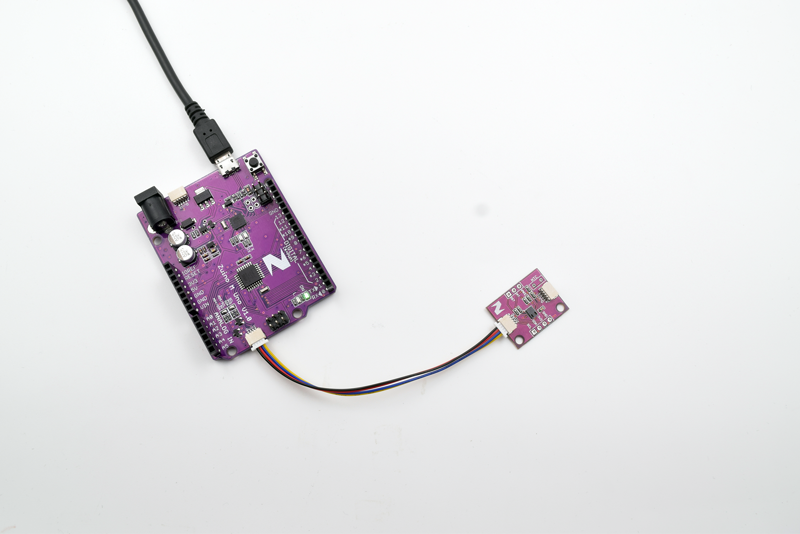
Connect Air quality Sensor to your development board
Connection with Zuino M Uno board
Connection with Zuino Xs PsyFi32 board
Installing Libraries
You need to install the following libraries to your Arduino IDE before you can start programming your Zuino board with Zio Qwiic Air Quality Sensor.
Download either one of the following libraries and save it on your local Arduino IDE libraries folder:
To install the libraries open your Arduino IDE, go to Sketch tab, select Include Library -> Add .Zip Library. Select the above libraries to be included on your IDE.

Testing Example Codes
The following demo uses Sparkfun’s CCS811 library if you installed Adafruit CCS811 library head straight here for the demo.
We are going to do the following example codes to demo our Air Quality Sensor:
1.Basic Reading
This is a test to demo what information you can get with Air Quality Sensor. With basic readings, you will get values for eCO2 and eTVOC and the number of seconds (millis) after reading the sensor.
Under File > Examples > Sparkfun CCS811 Arduino Library, select Example1_BasicReadings.
Comment (add a double backslash “//” before #define) the line 43 and uncomment (remove double backslash “//” ) line 44 to define the I2C address of our Air Quality Sensor.

*To display line numbers, go to File > Preferences (or Ctrl+Comma for Windows) and check the box for Display Line Numbers

Run the code. After your IDE finished uploading the code to your board open your serial monitor and upon success, you will get readings for the Air Quality Sensor. Make sure you configured your IDE tools with the right board and port, and serial is at 9600 baud.

2. Twenty Minute test
It takes twenty minutes to warm up and calibrate your sensor in order to retrieve a valid or accurate value. This demo will display the code that tells you that although your sensor is working, the value might not be reliable. The sensor will do a warm-up test for twenty minutes before it can really produce reliable results.
Under File > Examples > Sparkfun CCS811 Arduino Library, select Example6_TwentyMinuteTest.
Comment (add a double backslash “//” before #define) the line 42 and uncomment (remove double backslash “//” ) line 43 to define the I2C address of our Air Quality Sensor.
Run the code.

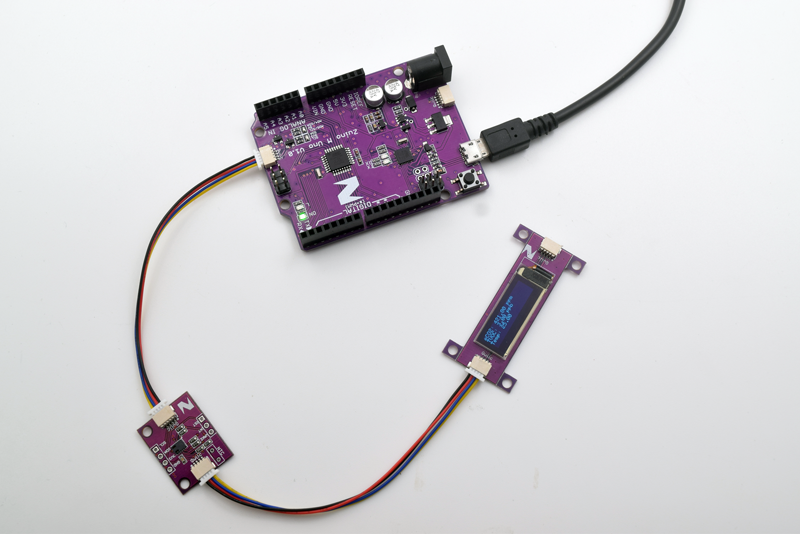
3. OLED Demo
We will do a demo test using Zio Qwiic 0.91in OLED Display and display basic reading test. For this example code, we will use Adafruit’s library and example code. You should have installed the Adafruit library below:
We also have a separate blog post and qwiic start guide for our OLED display. You can check it out here.
Below is the code for testing our Air Quality Sensor with OLED showing basic readings and warming up for twenty minutes. You can download the demo code here.
Using Adafruit CCS811 library Test Code
We are going to do the following example codes to demo our Air Quality Sensor:
This is a test to demo what information you can get with Air Quality Sensor. With basic readings, you will get values for eCO2 and eTVOC, and temperature after successful reading of the sensor.
Under File > Examples > Adafruit CCS811 Library, select CCS811_Test.
Upload and run the code. Make sure you configured the IDE to match the right development board and port before running your code. Open the serial monitor to check your results.

Alternatively, you can display the results on an OLED display. We will be using our own Zio Qwiic 0.91in OLED display for this demo.
For this example code, we will use Adafruit’s library and example code. You should have installed the Adafruit library below:
We also have a separate blog post and qwiic start guide for our OLED display. You can check it out here.
Under File > Examples > Adafruit CCS811 Library, select CCS811_OLED_Demo.
Run the code to your board. With successful upload, your OLED will display results from the Air Quality sensor showing eCO2, eTVOC and Temperature values.