


")
")
")

Control a Robotic Arm with Zio - Part 2
Introduction
You can check other series of the Tutorial below:
- Control Robotic Arm with Zio Part 1
- Control Robotic Arm with Zio Part 2
- Control Robotic Arm with Zio Part 3
- Control Robotic Arm with Zio Part 4
1. Project Overview
Difficulty Level:
Helpful resources:
Hardware:
- Zio Zuino M UNO
- Zio 16 Servo Controller
- Zio DC/DC Booster
- 3.7V 2000mAh Battery
- Robotic Arm
- PS2 Wireless Controller
- PS2 Wireless Remote Receiver
Software:
Cables & Wires:
- 200mm Qwiic cable
- Male to Female Jumper Wires
2. Schematics

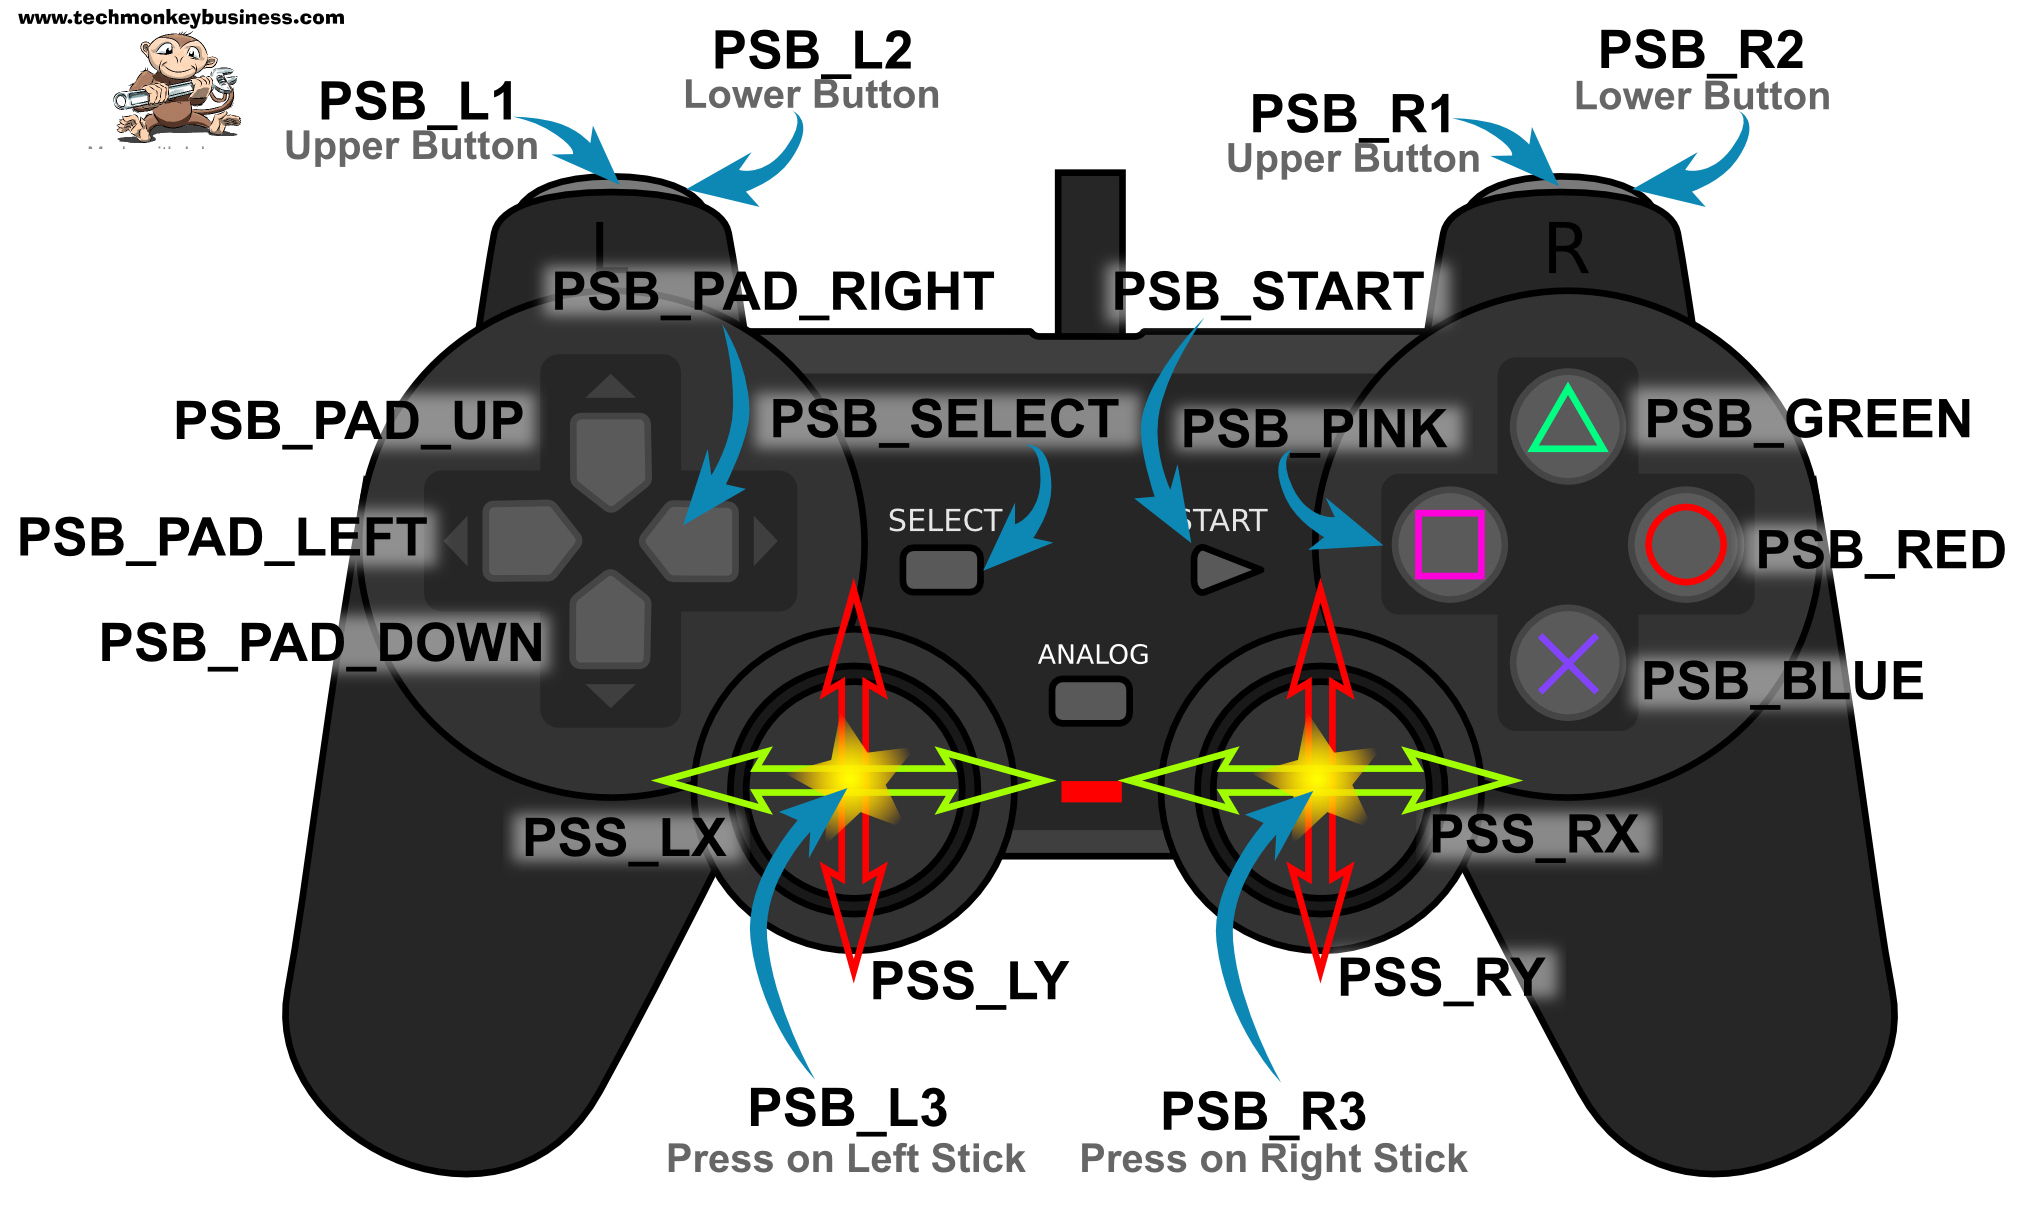
PS2 Controller Diagram
3. Zio Modules Connection Set up
Connect the Robotic Arm servo to Zio 16 Servo Controller

Connect your 16 Servo to DC/DC Booster and set it at 6.0V.
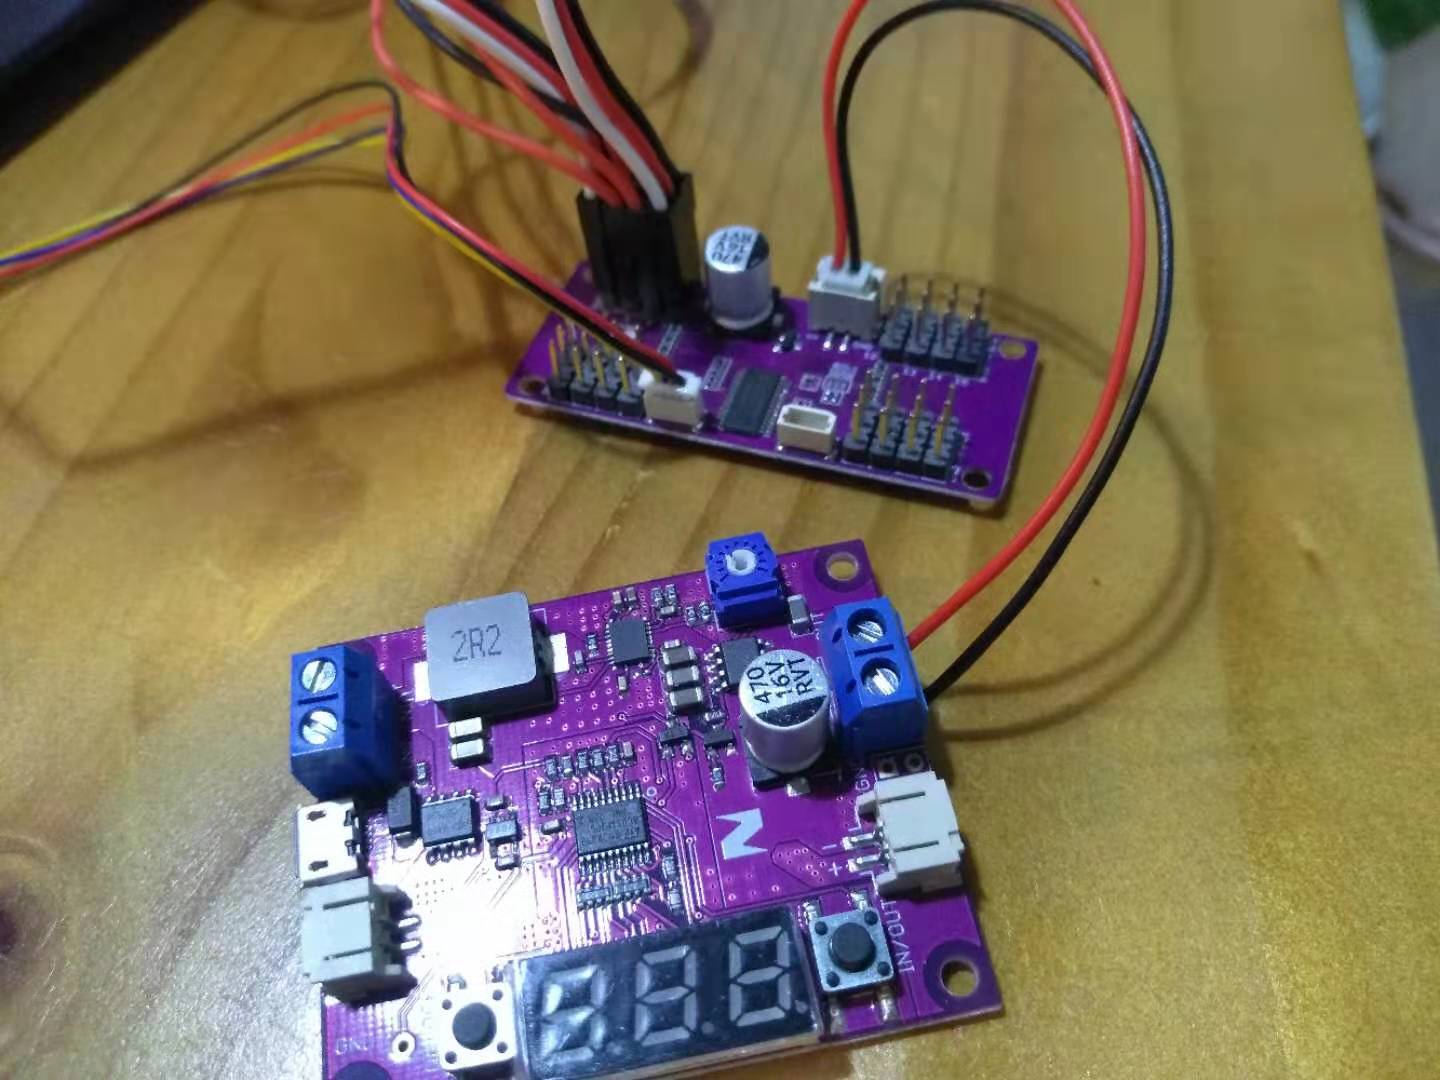
We use a DC/DC Booster to boost and adjust the battery supply voltage to 6.0.
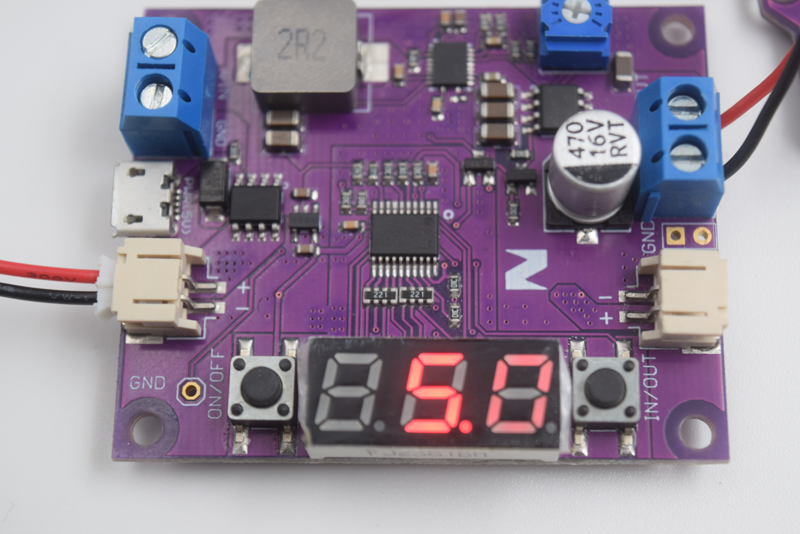
Use the potentiometer on the DC Booster to adjust the voltage until you get 6.0. Push the In/Out button until the display shows 6.0. You need to supply power (3.7V battery) first to your DC/DC Booster in order to adjust the voltage.
Connect Zuino M Uno to the Zio 16 Servo Controller

Qwiic connect Zuino M Uno to the Zio Servo controller with qwiic cable.
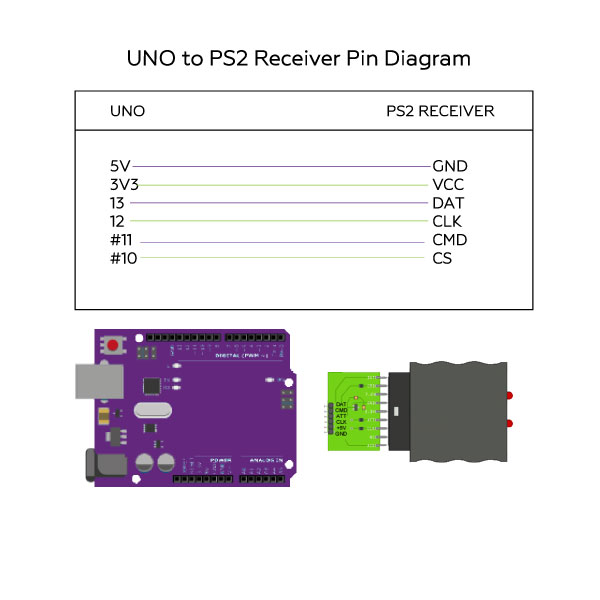
Connecting Uno to the PS2 Receiver
4. Coding the Robotic Arm
Installing Libraries
Run your code.
- Switch on your PS2 Controller. Check that the Mode LED lights up. If it doesn’t, press the Mode button on your controller.
- After doing the above, you need to press the reset button on your Zuino M Uno for it to read your controller settings.
- You need to Press L1 and the Joystick to move your Robotic Arm.
- Left Joystick controls the bending of the Arm upwards or downwards
- Right Joystick controls the Claw to either open or close and rotating the claw to the left or right.
Code Explanation
* set pins connected to PS2 controller:
* - 1e column: original
* - 2e colmun: Stef?
* replace pin numbers by the ones you use
******************************************************************/
#define PS2_DAT 13 //14
#define PS2_CMD 11 //15
#define PS2_SEL 10 //16
#define PS2_CLK 12 //17
/******************************************************************

  * select modes of PS2 controller:

  *   - pressures =
analog reading of push-butttons
  *   - rumble    = motor rumbling

  * uncomment 1 of the lines for each mode selection

******************************************************************/


//#define pressures   true

#define pressures   false


//#define rumble      true

#define rumble      false
void loop() {


/* You must Read Gamepad to get new values and set vibration values

ps2x.read_gamepad(small motor on/off, larger motor
strenght from 0-255)
if you don't enable the rumble, use ps2x.read_gamepad(); with no values
You should call this at least once a second
*/
if(error == 1) //skip loop if no controller found
return;
else { //DualShock Controller
ps2x.read_gamepad(false, vibrate); //read controller and set large motor to spin at 'vibrate' speed
if(ps2x.Button(PSB_START)) //will be TRUE as long as button is pressed
Serial.println("Start is being held");
if(ps2x.Button(PSB_SELECT))
Serial.println("Select is being held");
vibrate = ps2x.Analog(PSAB_CROSS); //this will set the large motor vibrate speed based on how hard you press the blue (X) button
if(ps2x.Button(PSB_L1) || ps2x.Button(PSB_R1)) { //print stick values if either is TRUE
RY_Value=ps2x.Analog(PSS_RY);
RX_Value=ps2x.Analog(PSS_RX);
LY_Value=ps2x.Analog(PSS_LY);
LX_Value=ps2x.Analog(PSS_LX);
Serial.print("Stick Values:");
Serial.print(RX_Value); Serial.print(" ");
Serial.print(RY_Value); Serial.print(" ");
Serial.print(LY_Value); Serial.print(" ");
Serial.println(LX_Value);
      pulselen0=map(RY_Value,0,127,SERVOMIN0,SERVOMAX0);

      pulselen1=map(RX_Value,0,127,SERVOMIN0,SERVOMAX0);

      pulselen2=map(LY_Value,0,127,SERVOMIN2,SERVOMAX2);

      pulselen3=map(LX_Value,0,255,SERVOMIN3,SERVOMAX3);
Got questions or suggestions? Or just want to greet us? Drop us a comment below!